Steps to set Entra as an OIDC identity provider:-
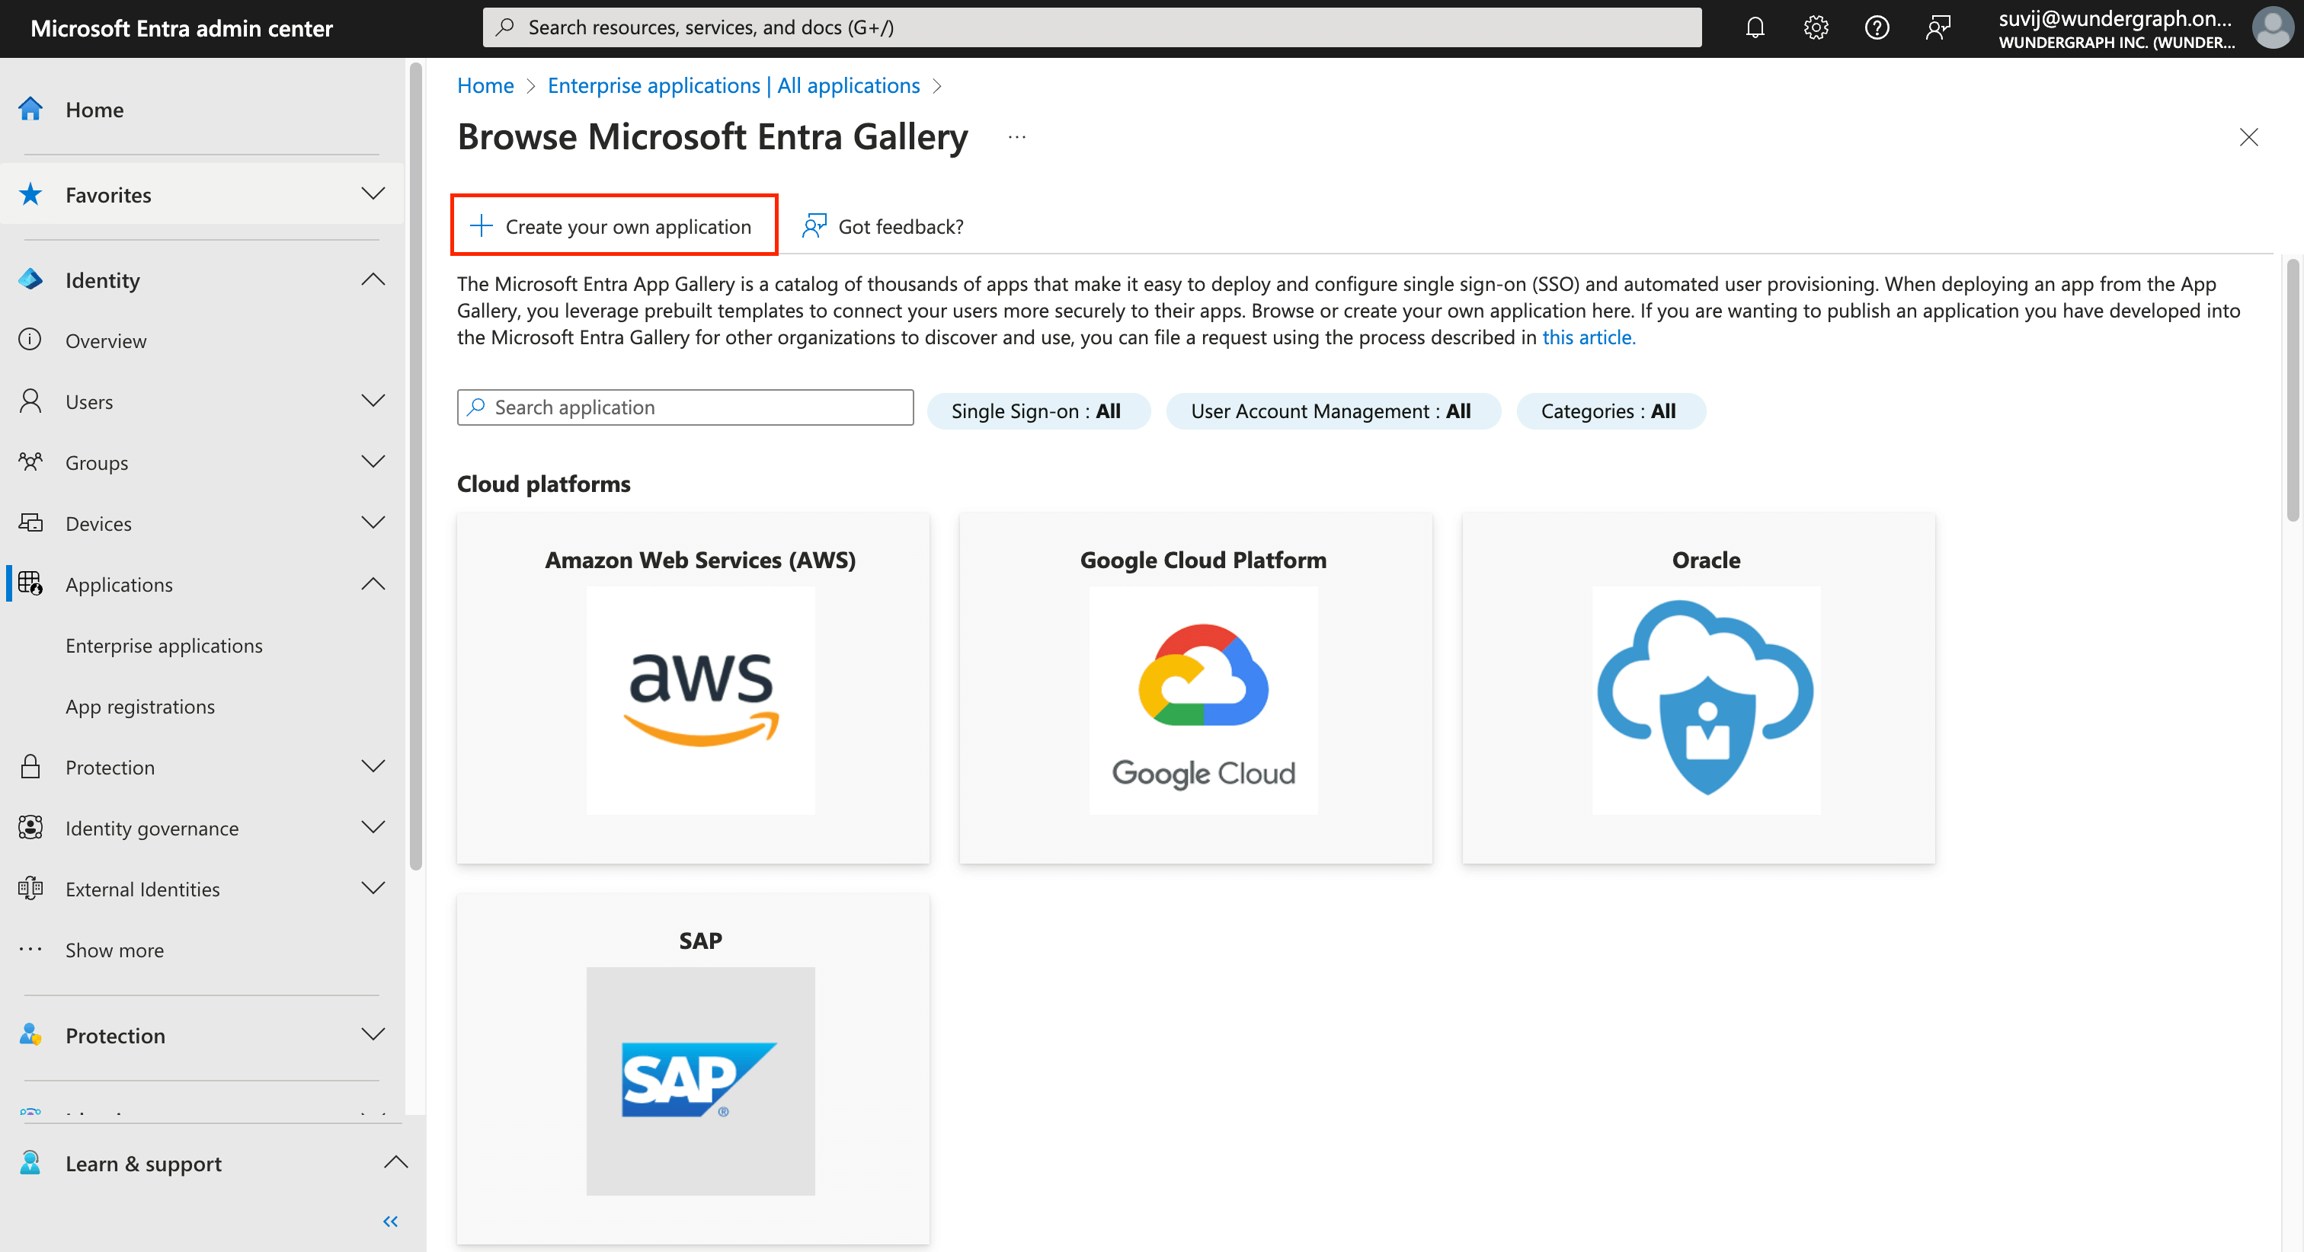
Log in to Microsoft Entra and navigate to the Identity/Applications/Enterprise applications view within Microsoft Entra.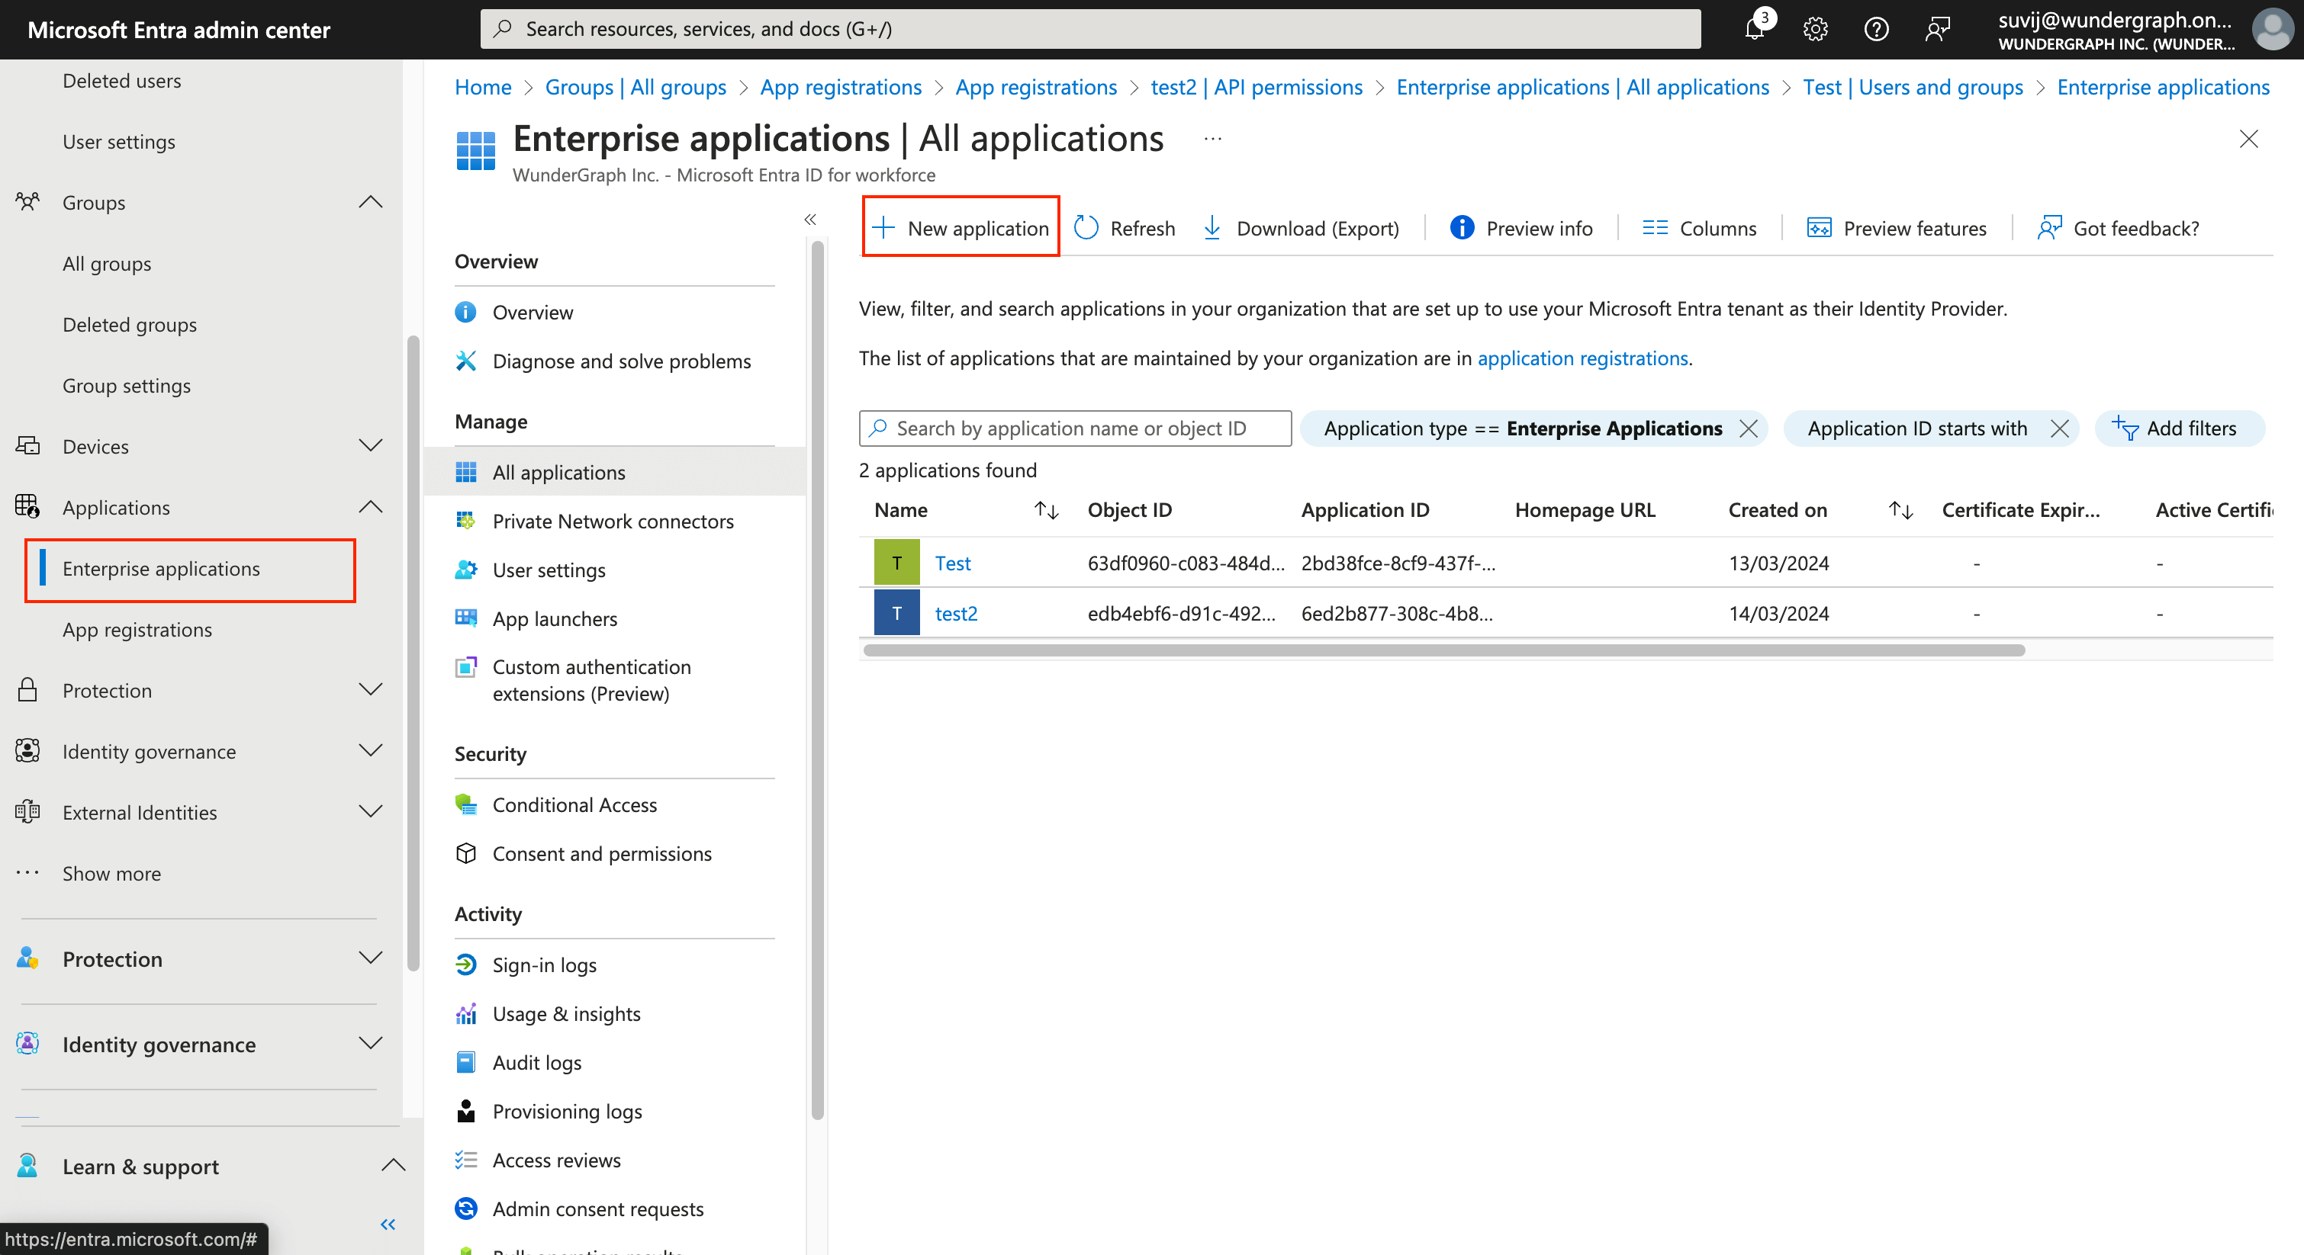

Provide a name to the application and select “Register an application to integrate with Microsoft Entra ID (App you’re developing)” for the application purpose, then click on the Create button.
Select who can use the application from the given options according to your needs and then click on Register.
Copy the Application(Client) ID, then click on Endpoints and then copy the OpenID Connect metadata document(Discovery Endpoint).

Click on New client secret, give it a description and select the expiry according to your needs and then click on Add.
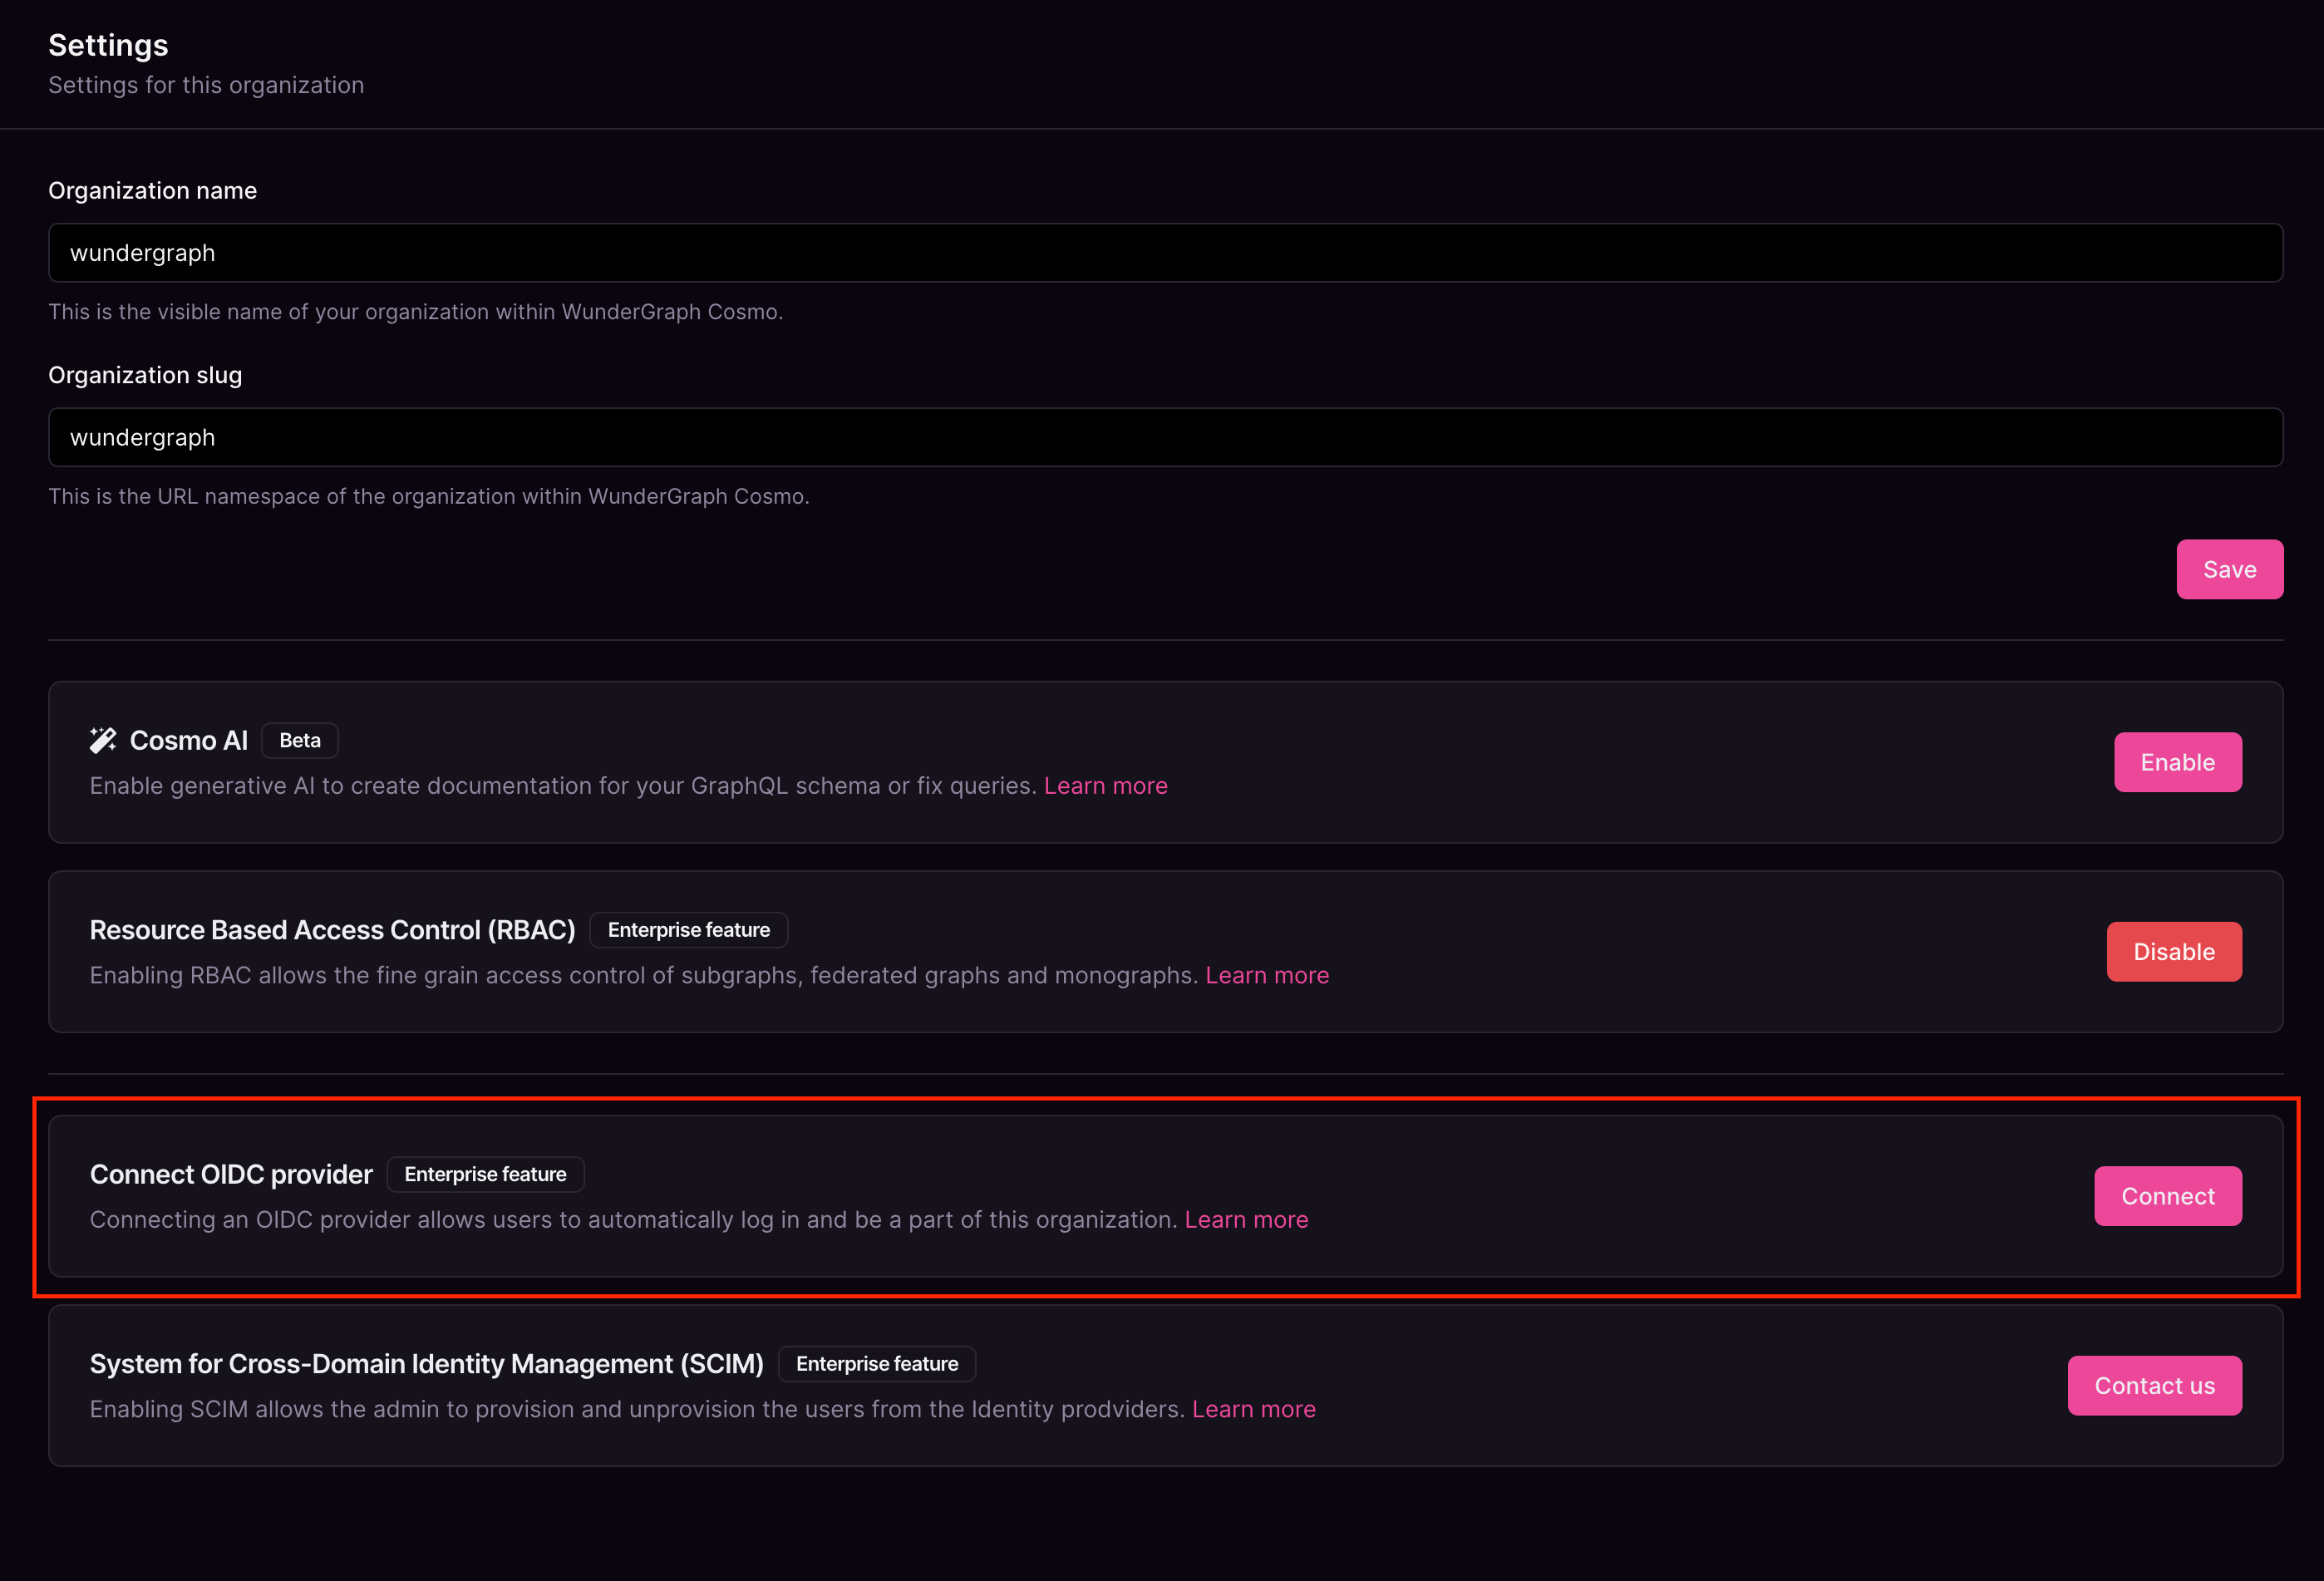
Give the connection a name, paste the OpenID Connect metadata document copied before, into the Discovery Endpoint, paste the Client ID and Client secret copied before into the Client ID and Client Secret fields respectively, and then click on Connect.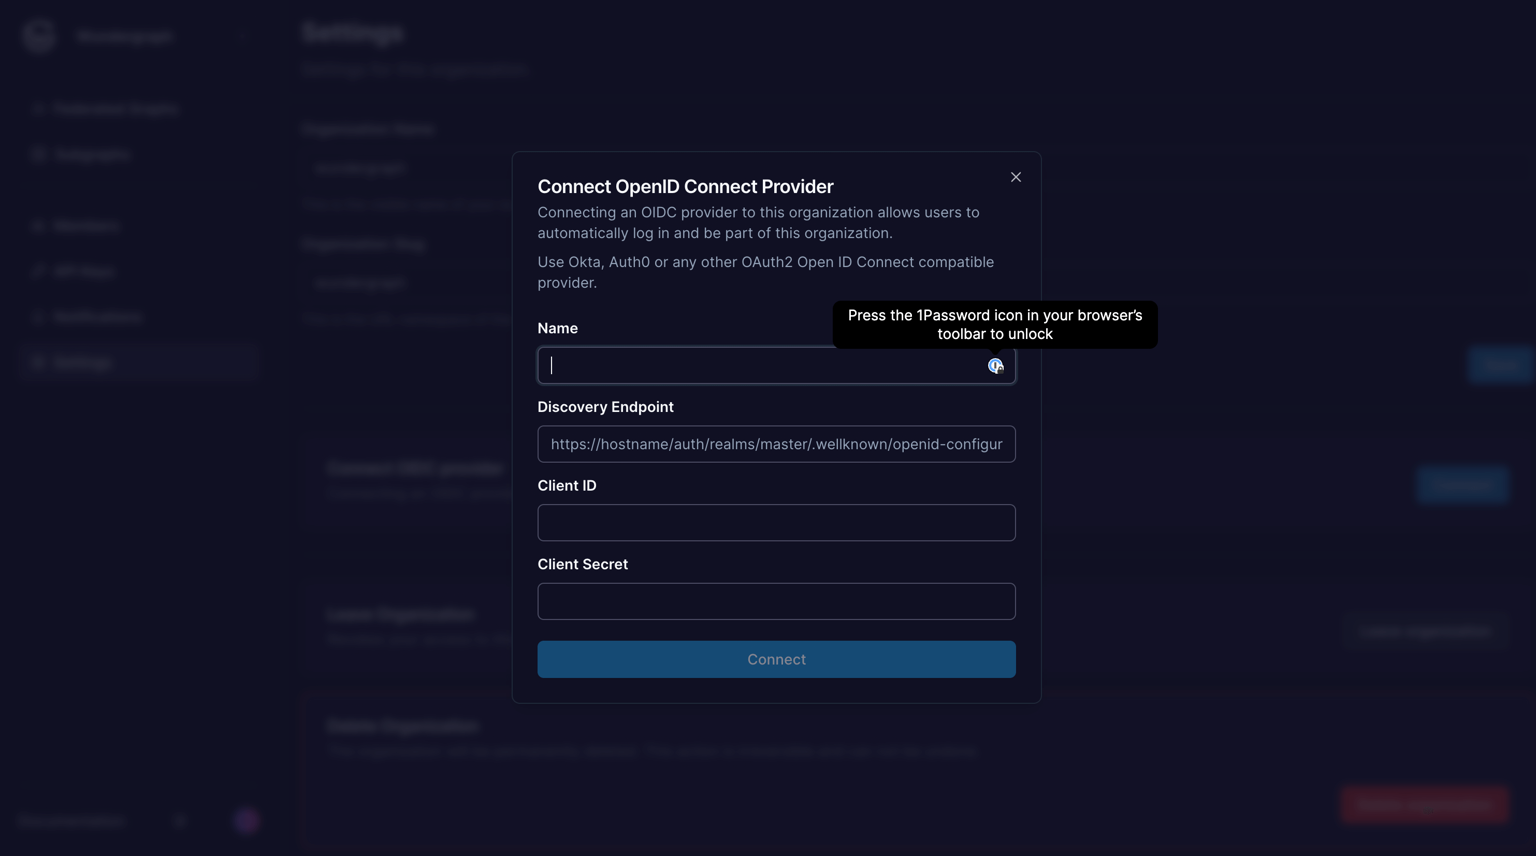

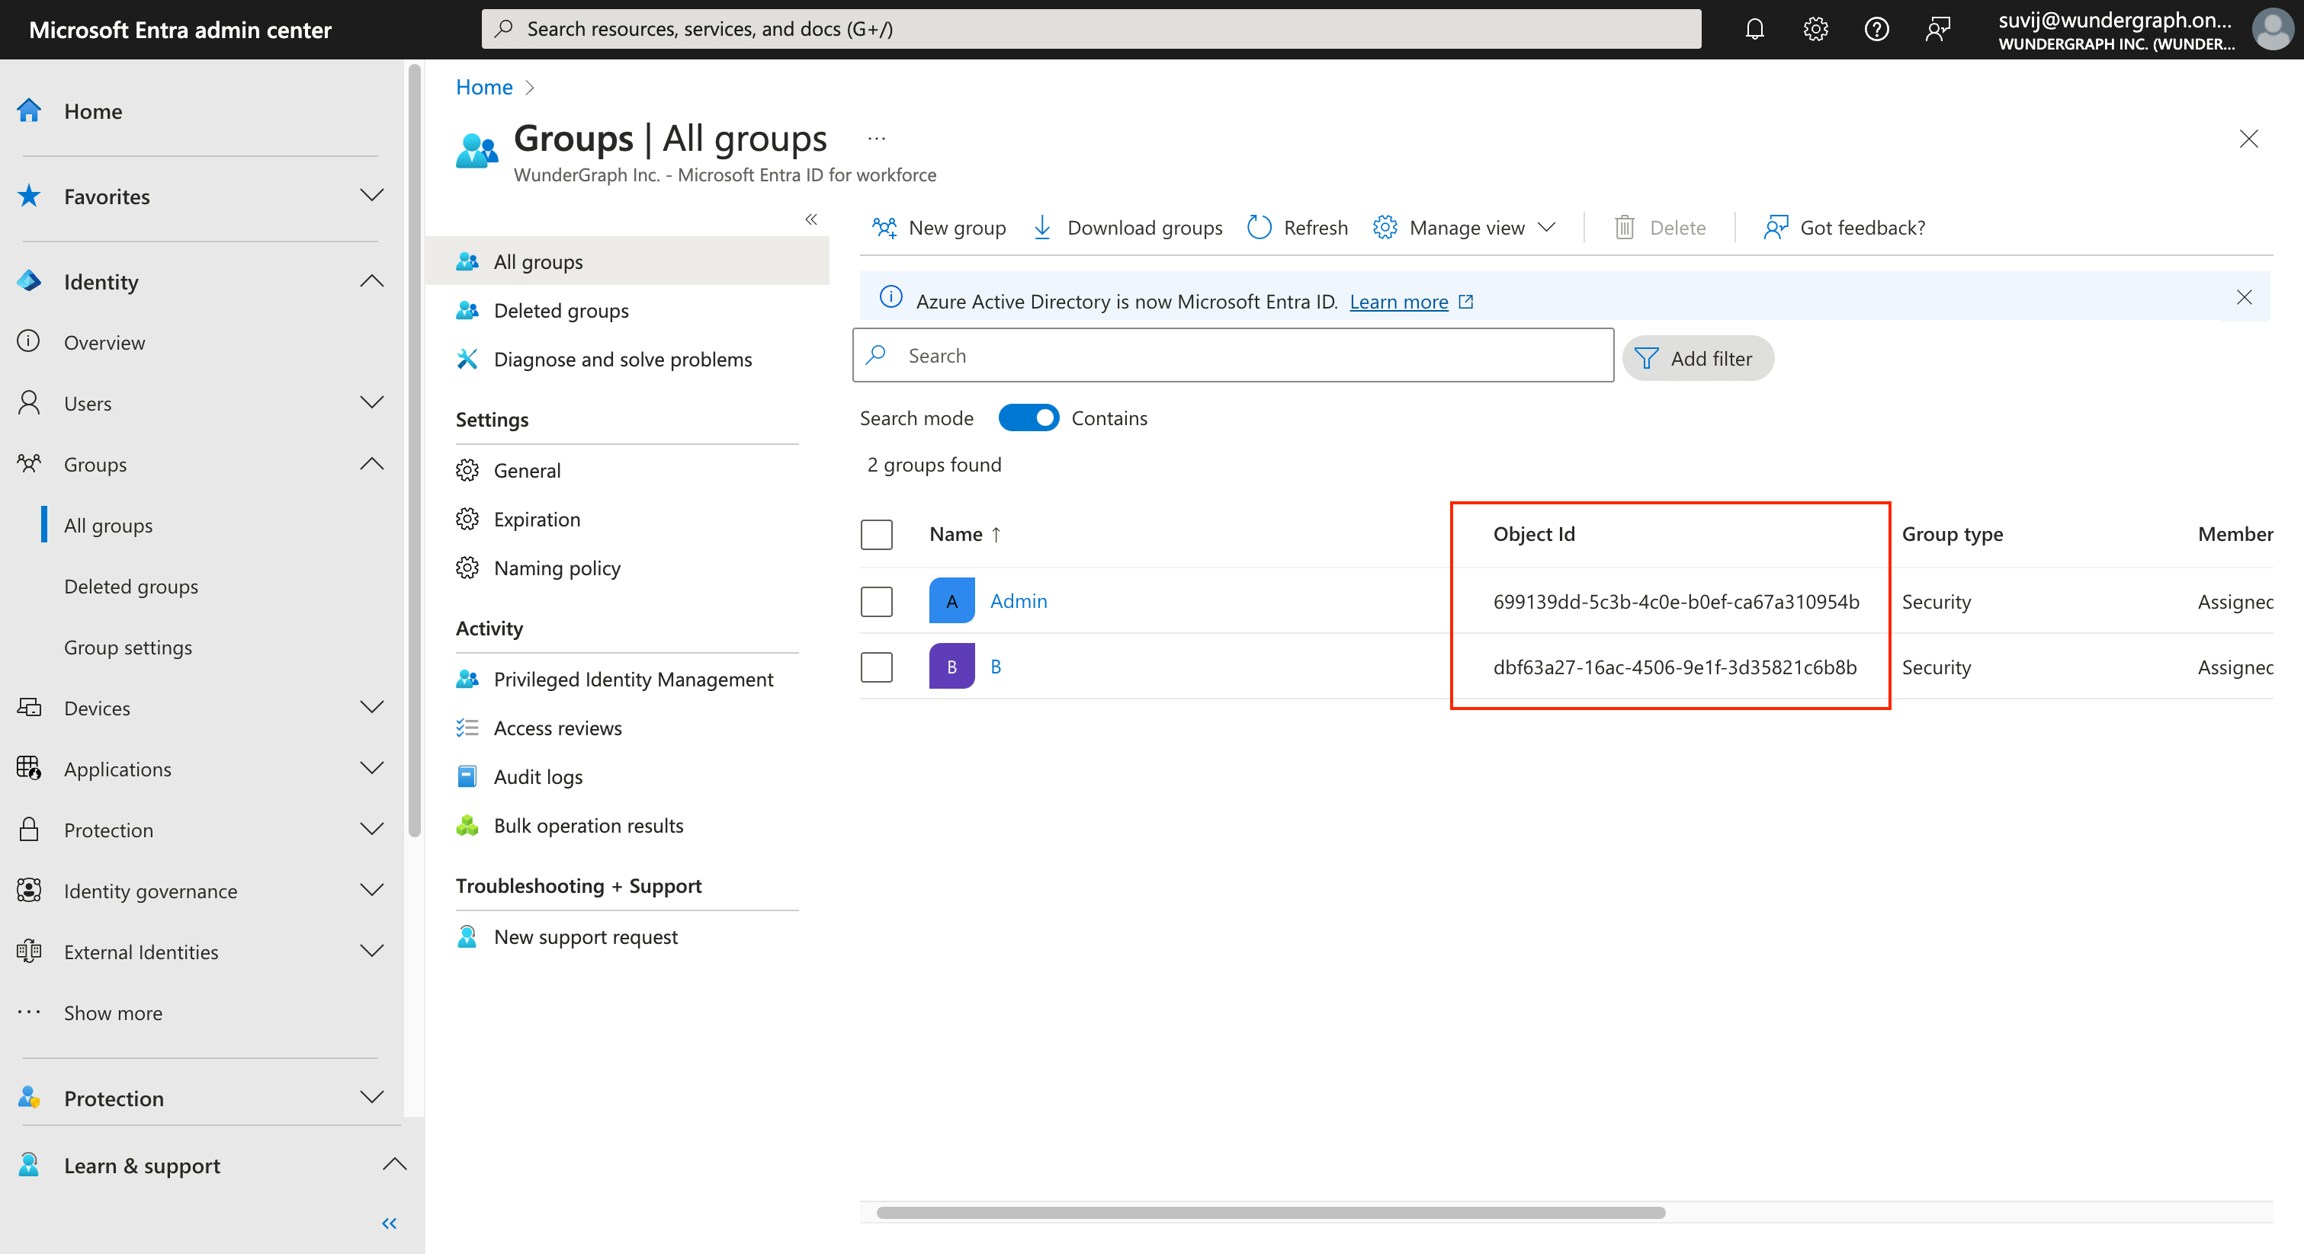
Configure the mapping between the roles in Cosmo and the groups in Microsoft Entra. The field Group in the provider should be populated with the Object ID of a group from Entra. Once all the mappers are configured, click on Save. Every member in those groups would get the respective role configured.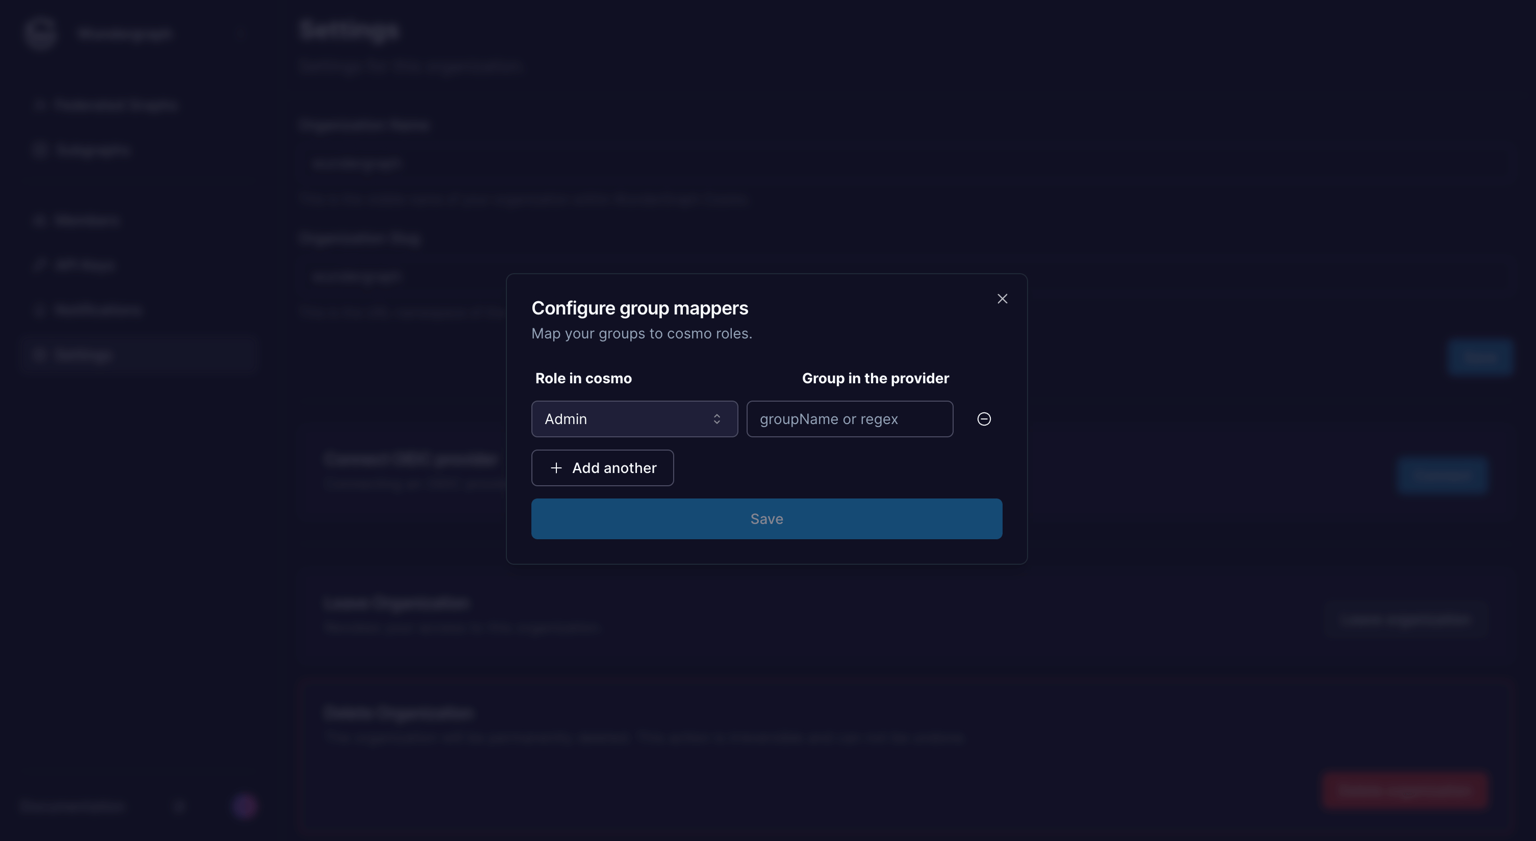


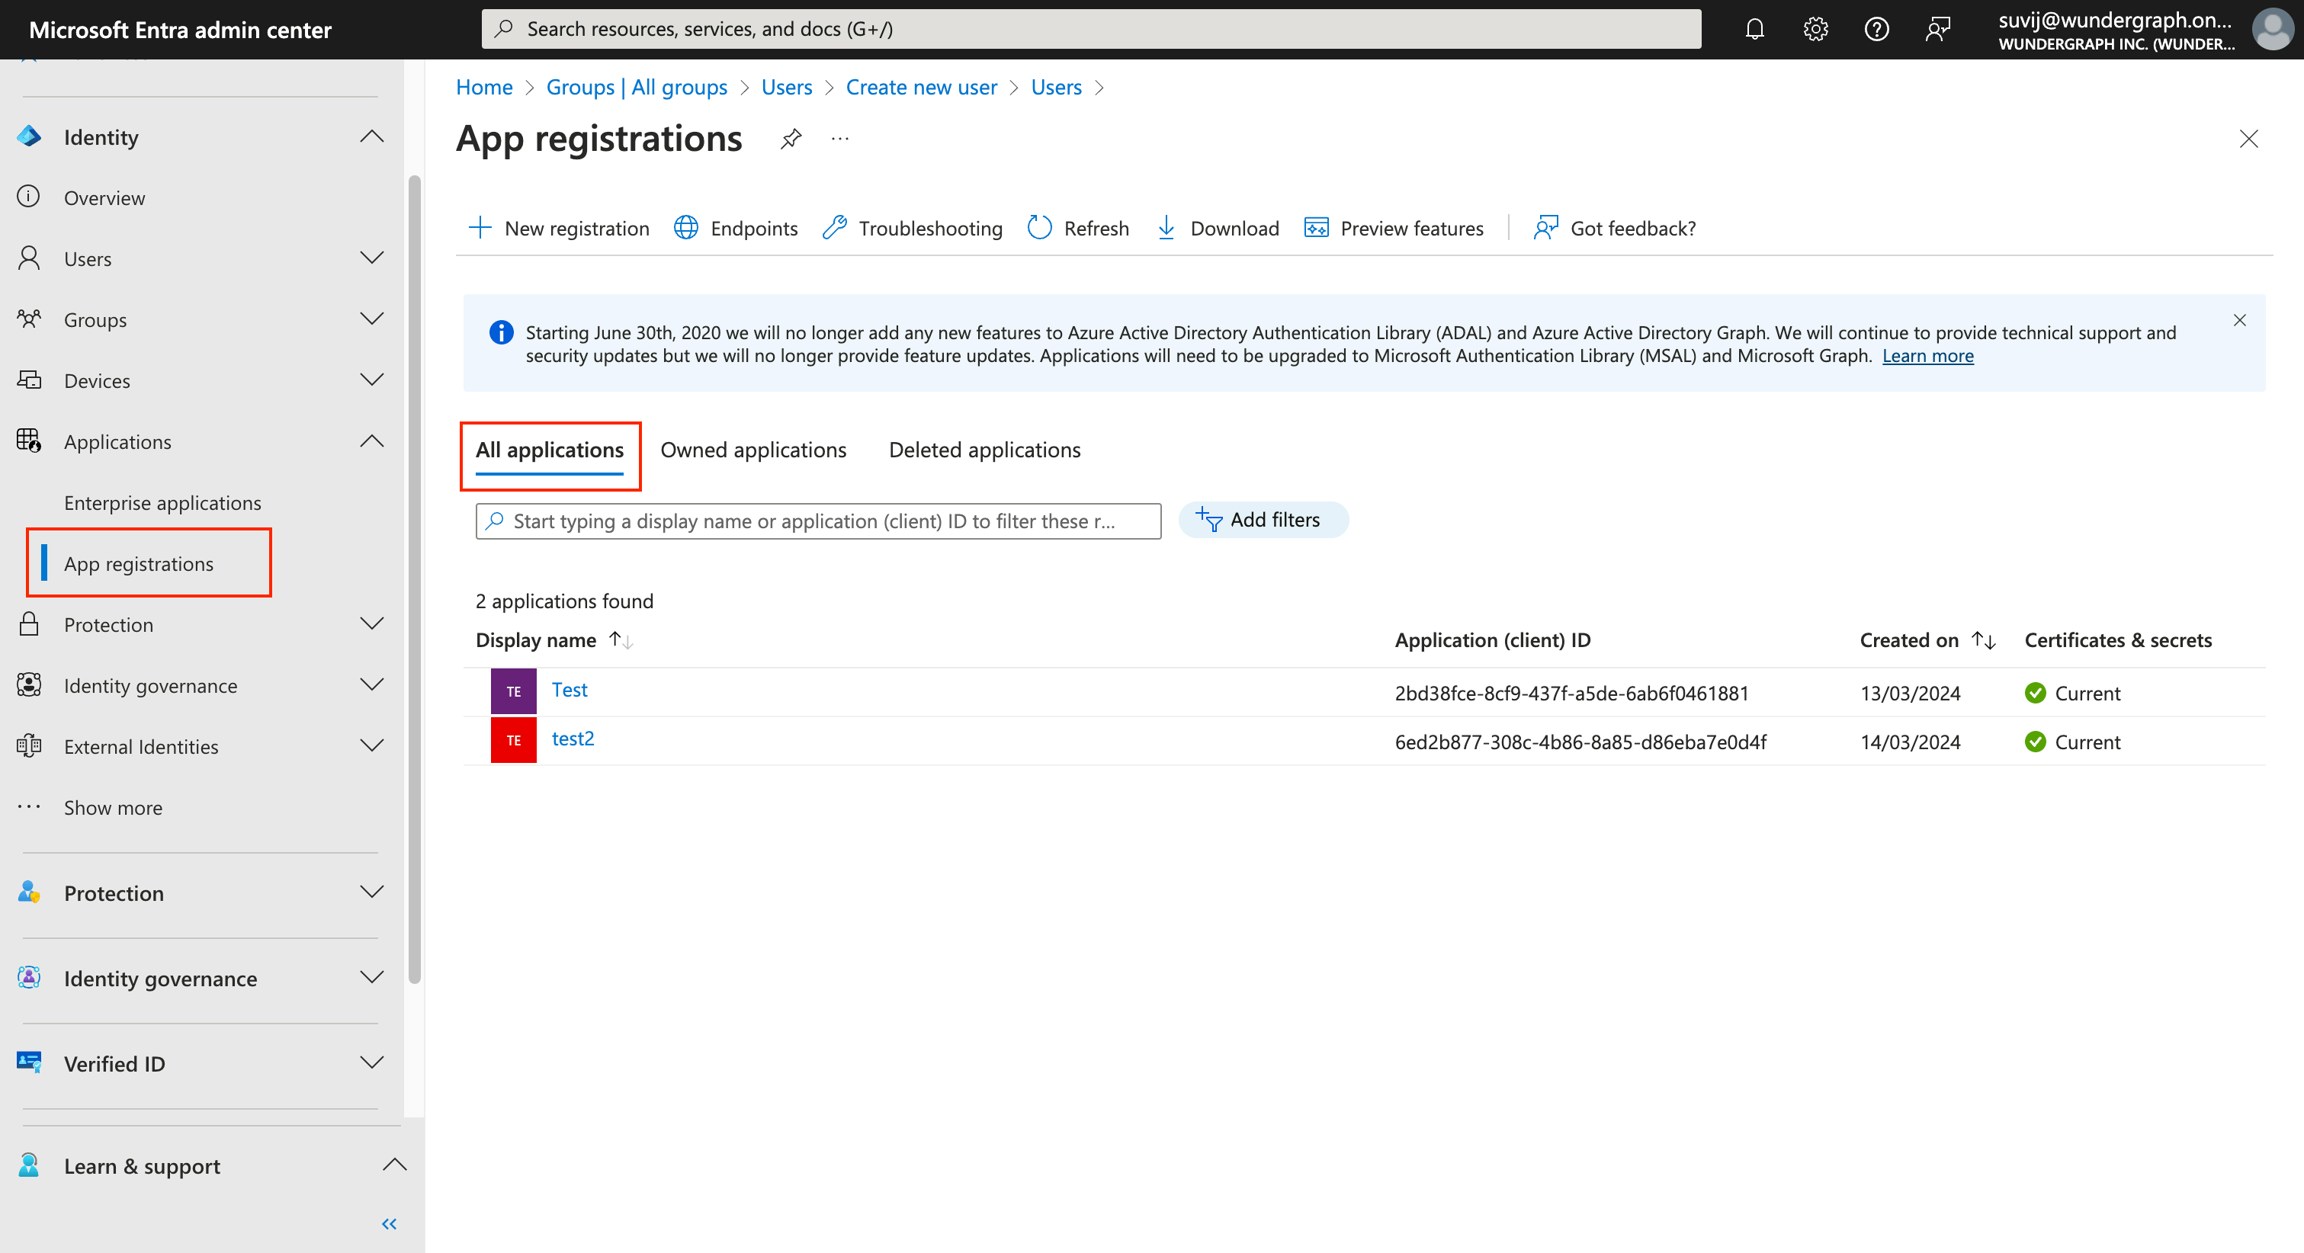
Navigate back to the App registrations page, in the All applications tab select the app which we created.
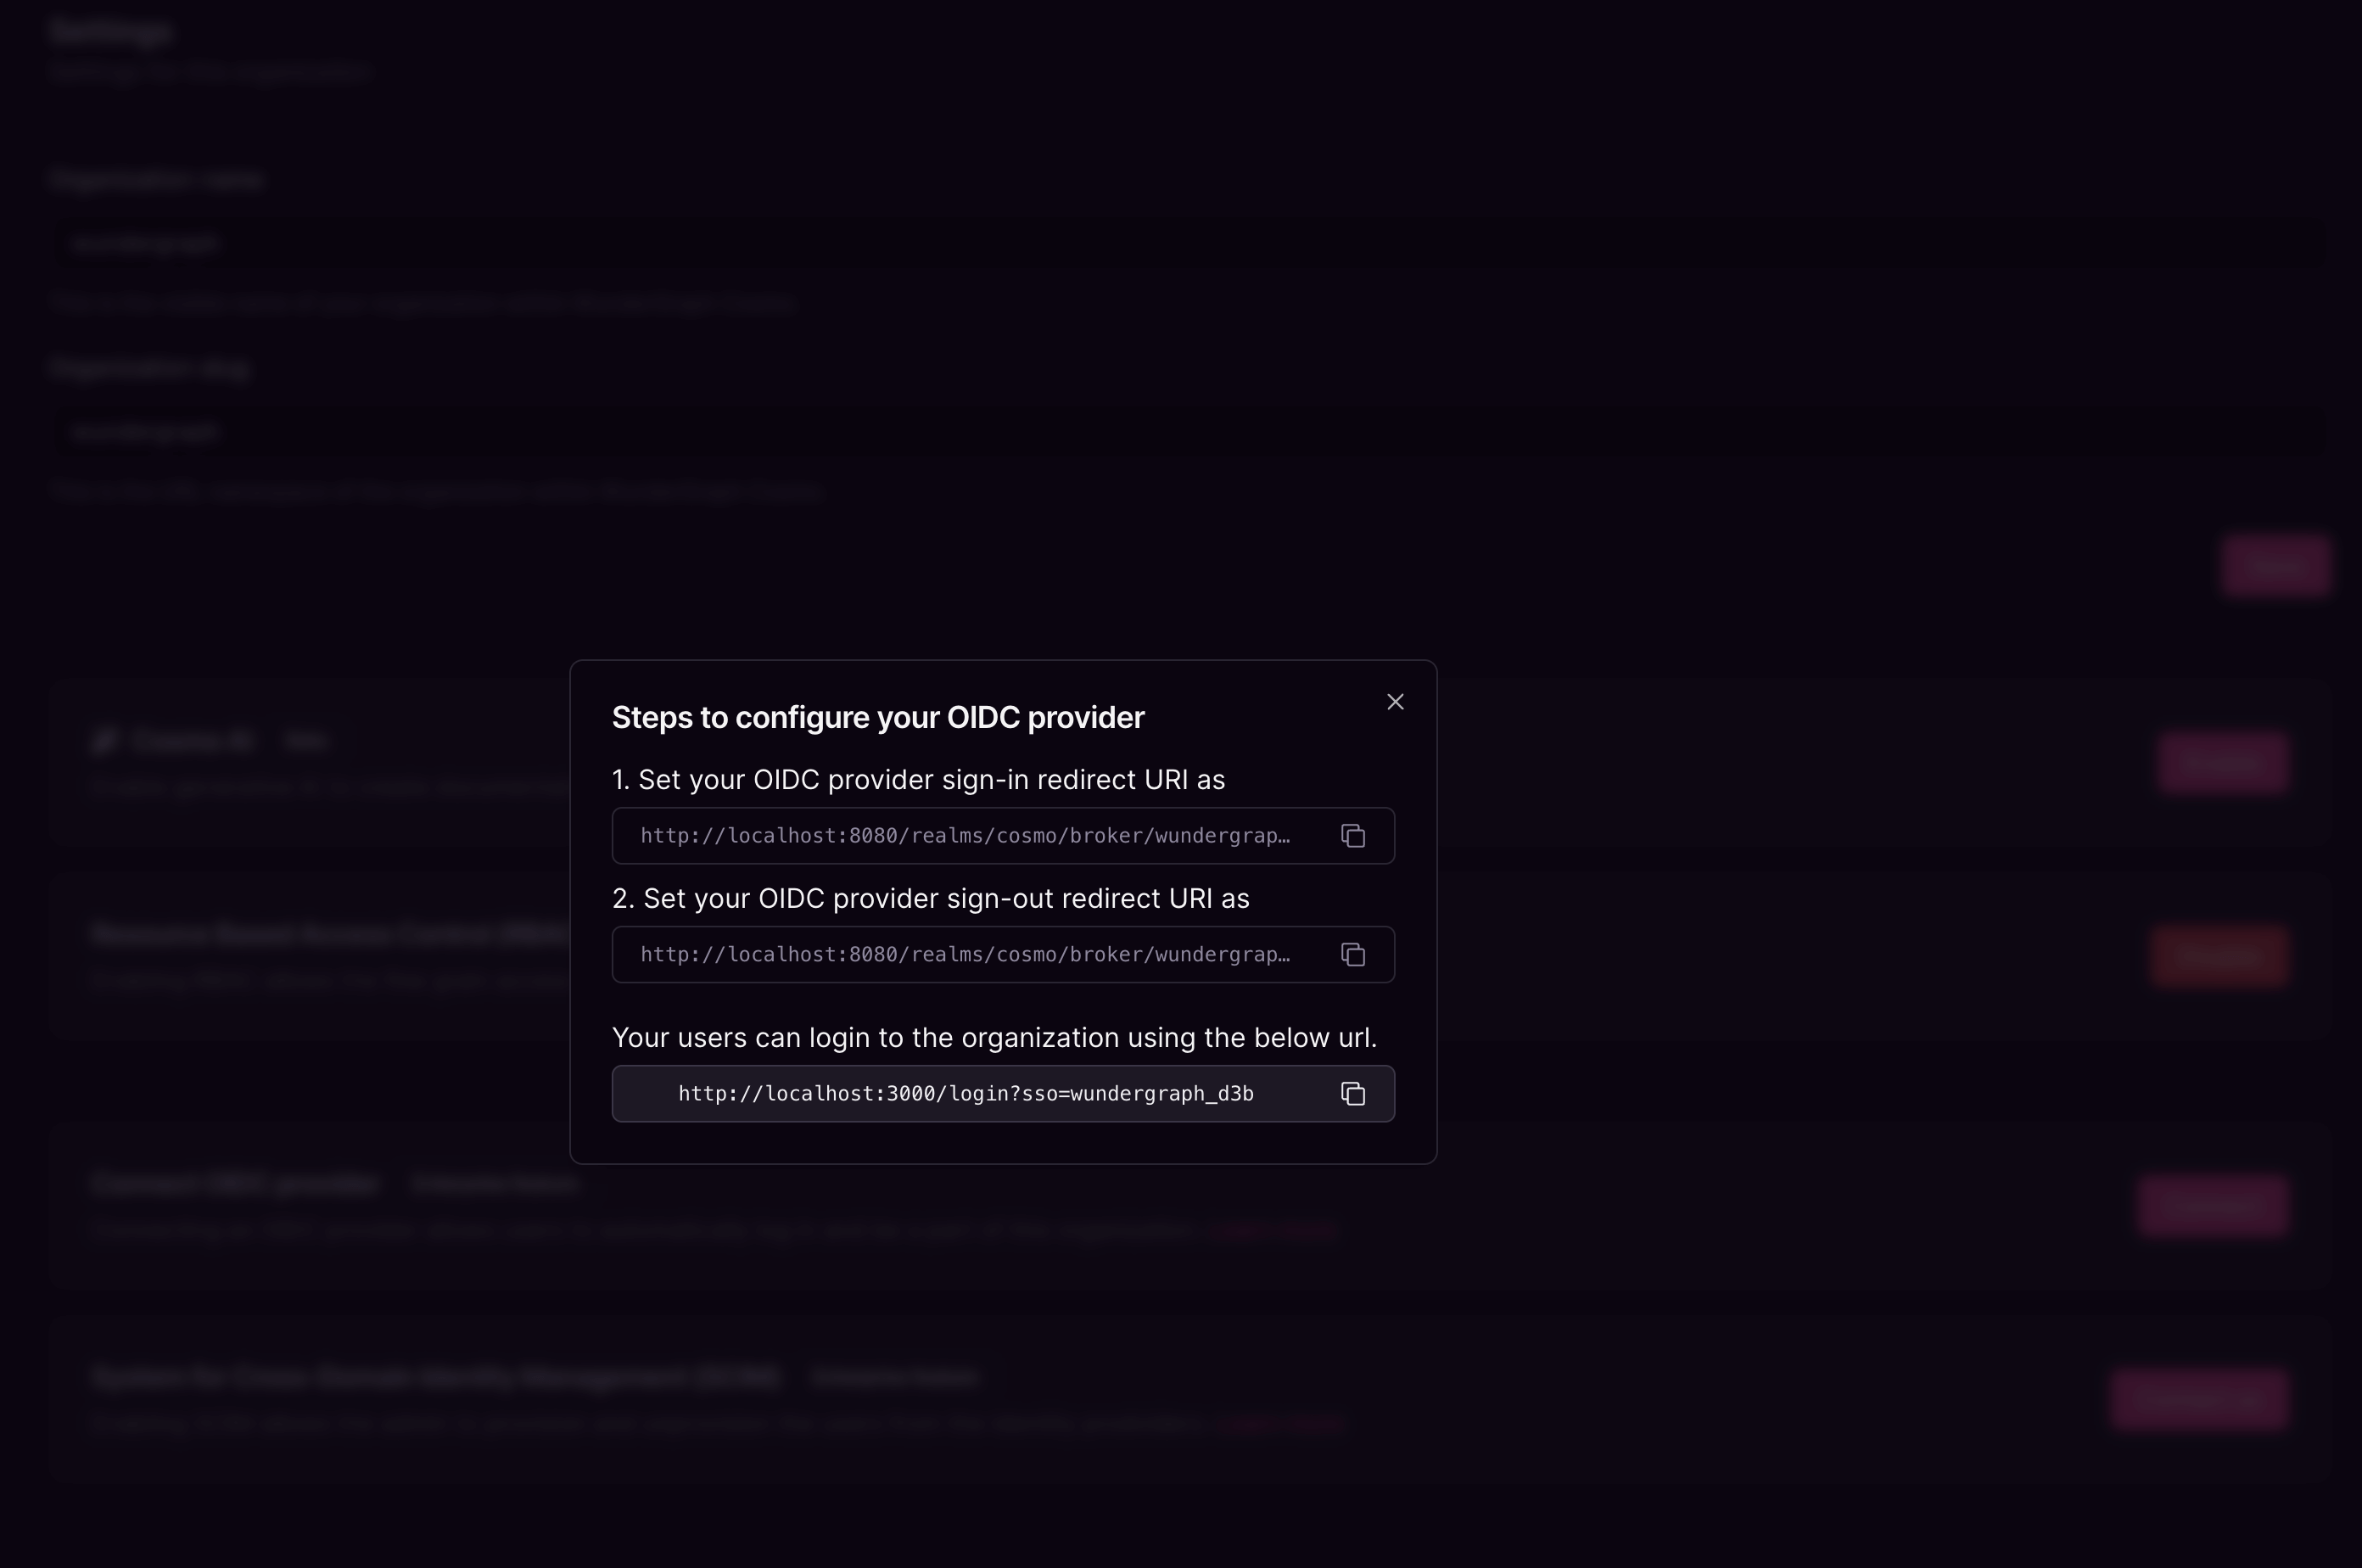
Click on Add a redirect URI, and now click on Add a platform, select Web and then paste the Sign-in and Sign-out redirect URIs in the Redirect URIs and Front-channel logout URL respectively.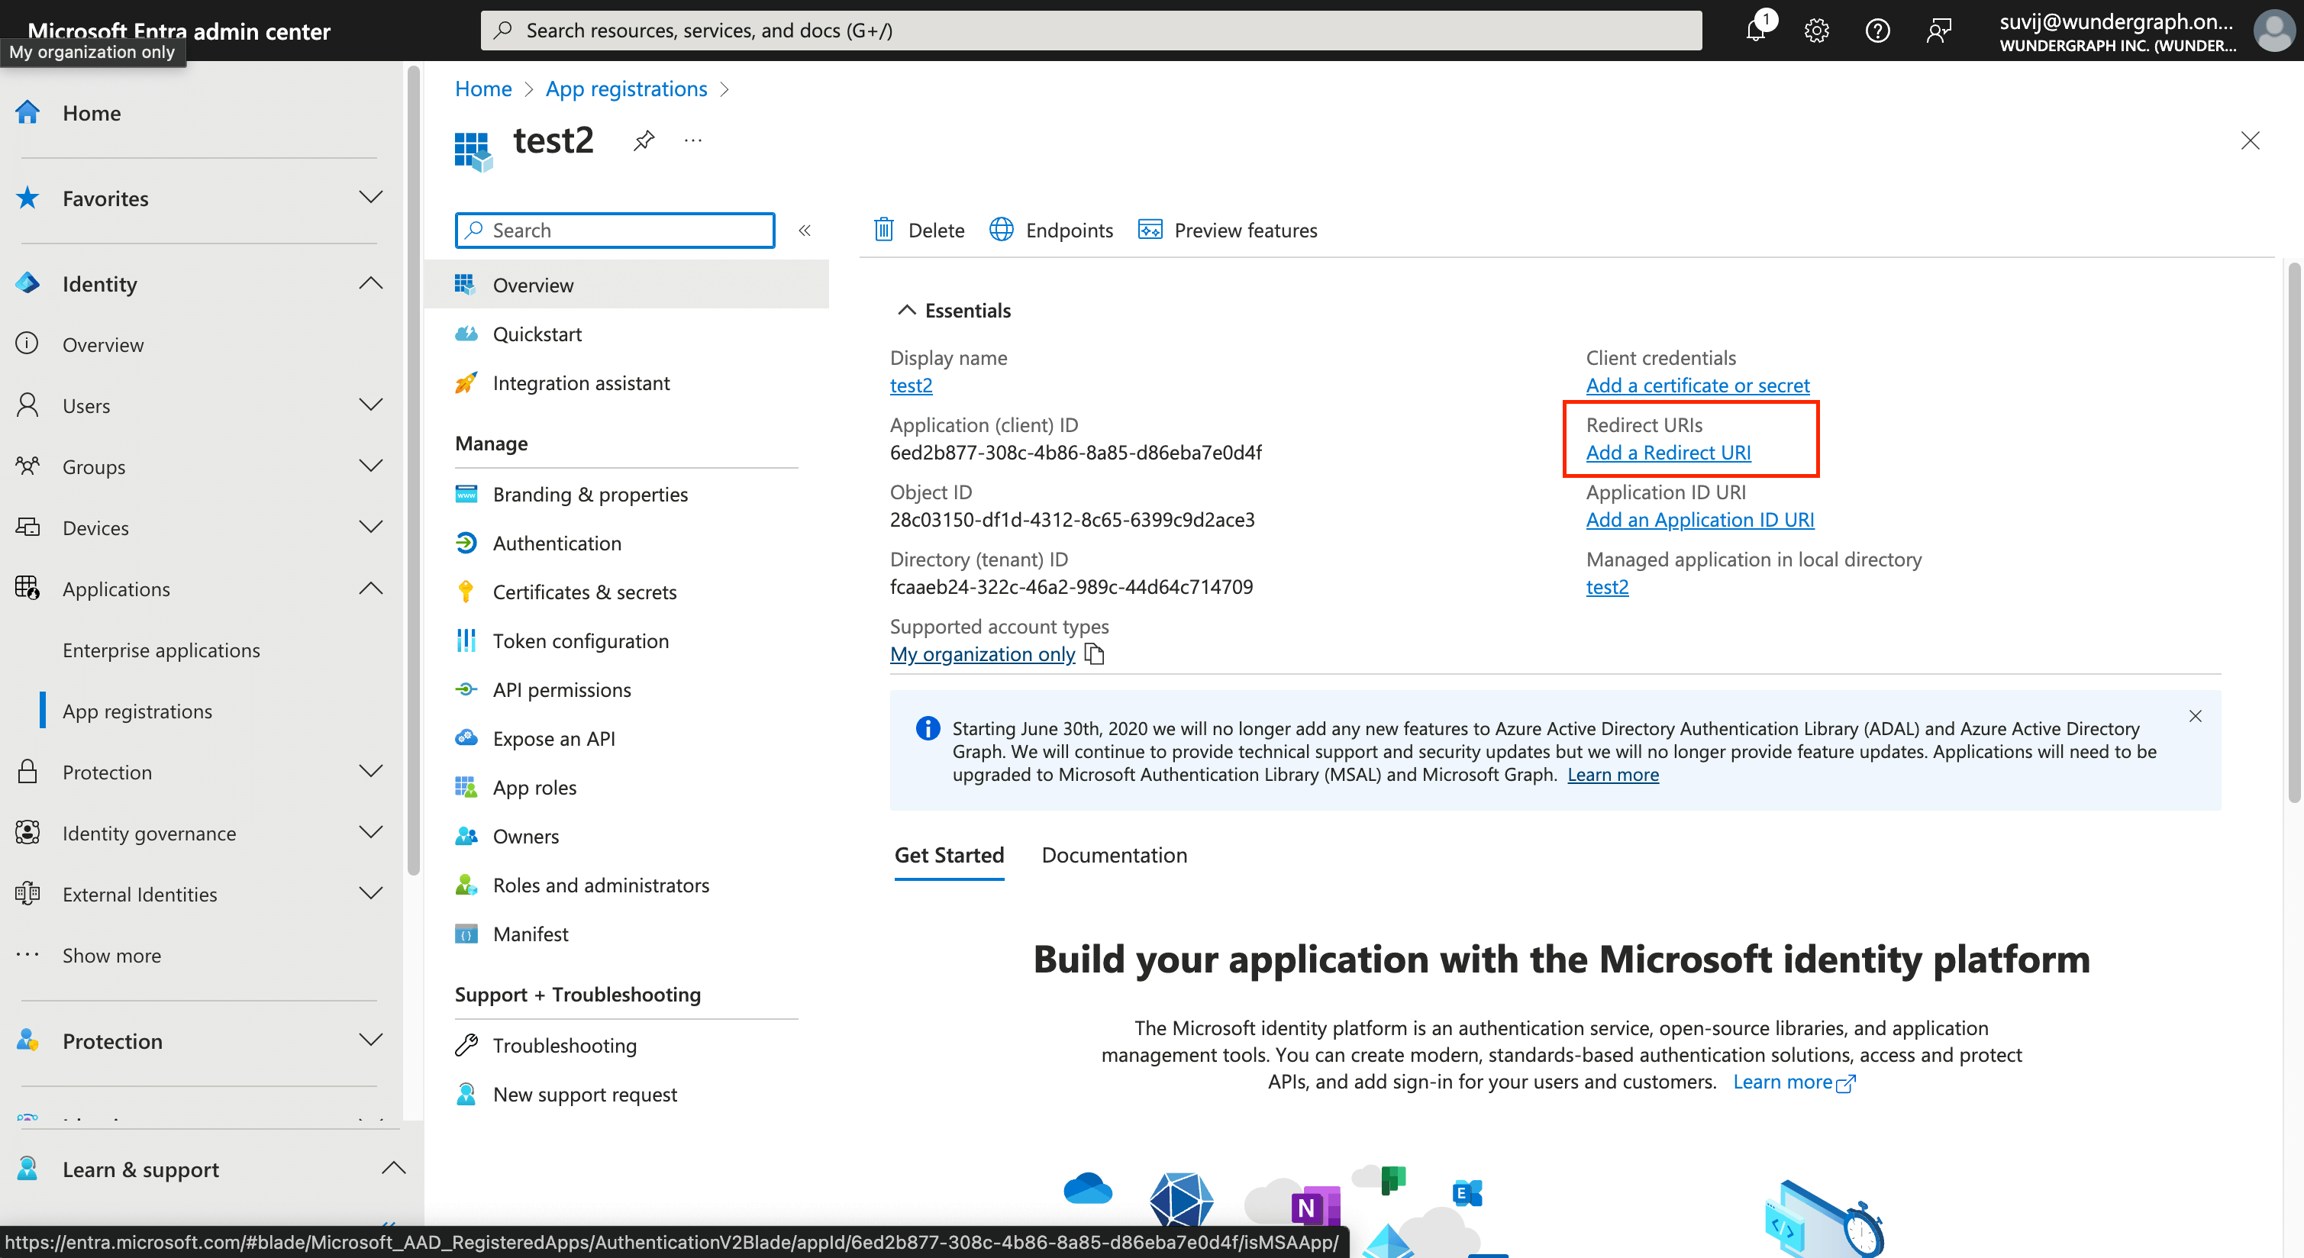

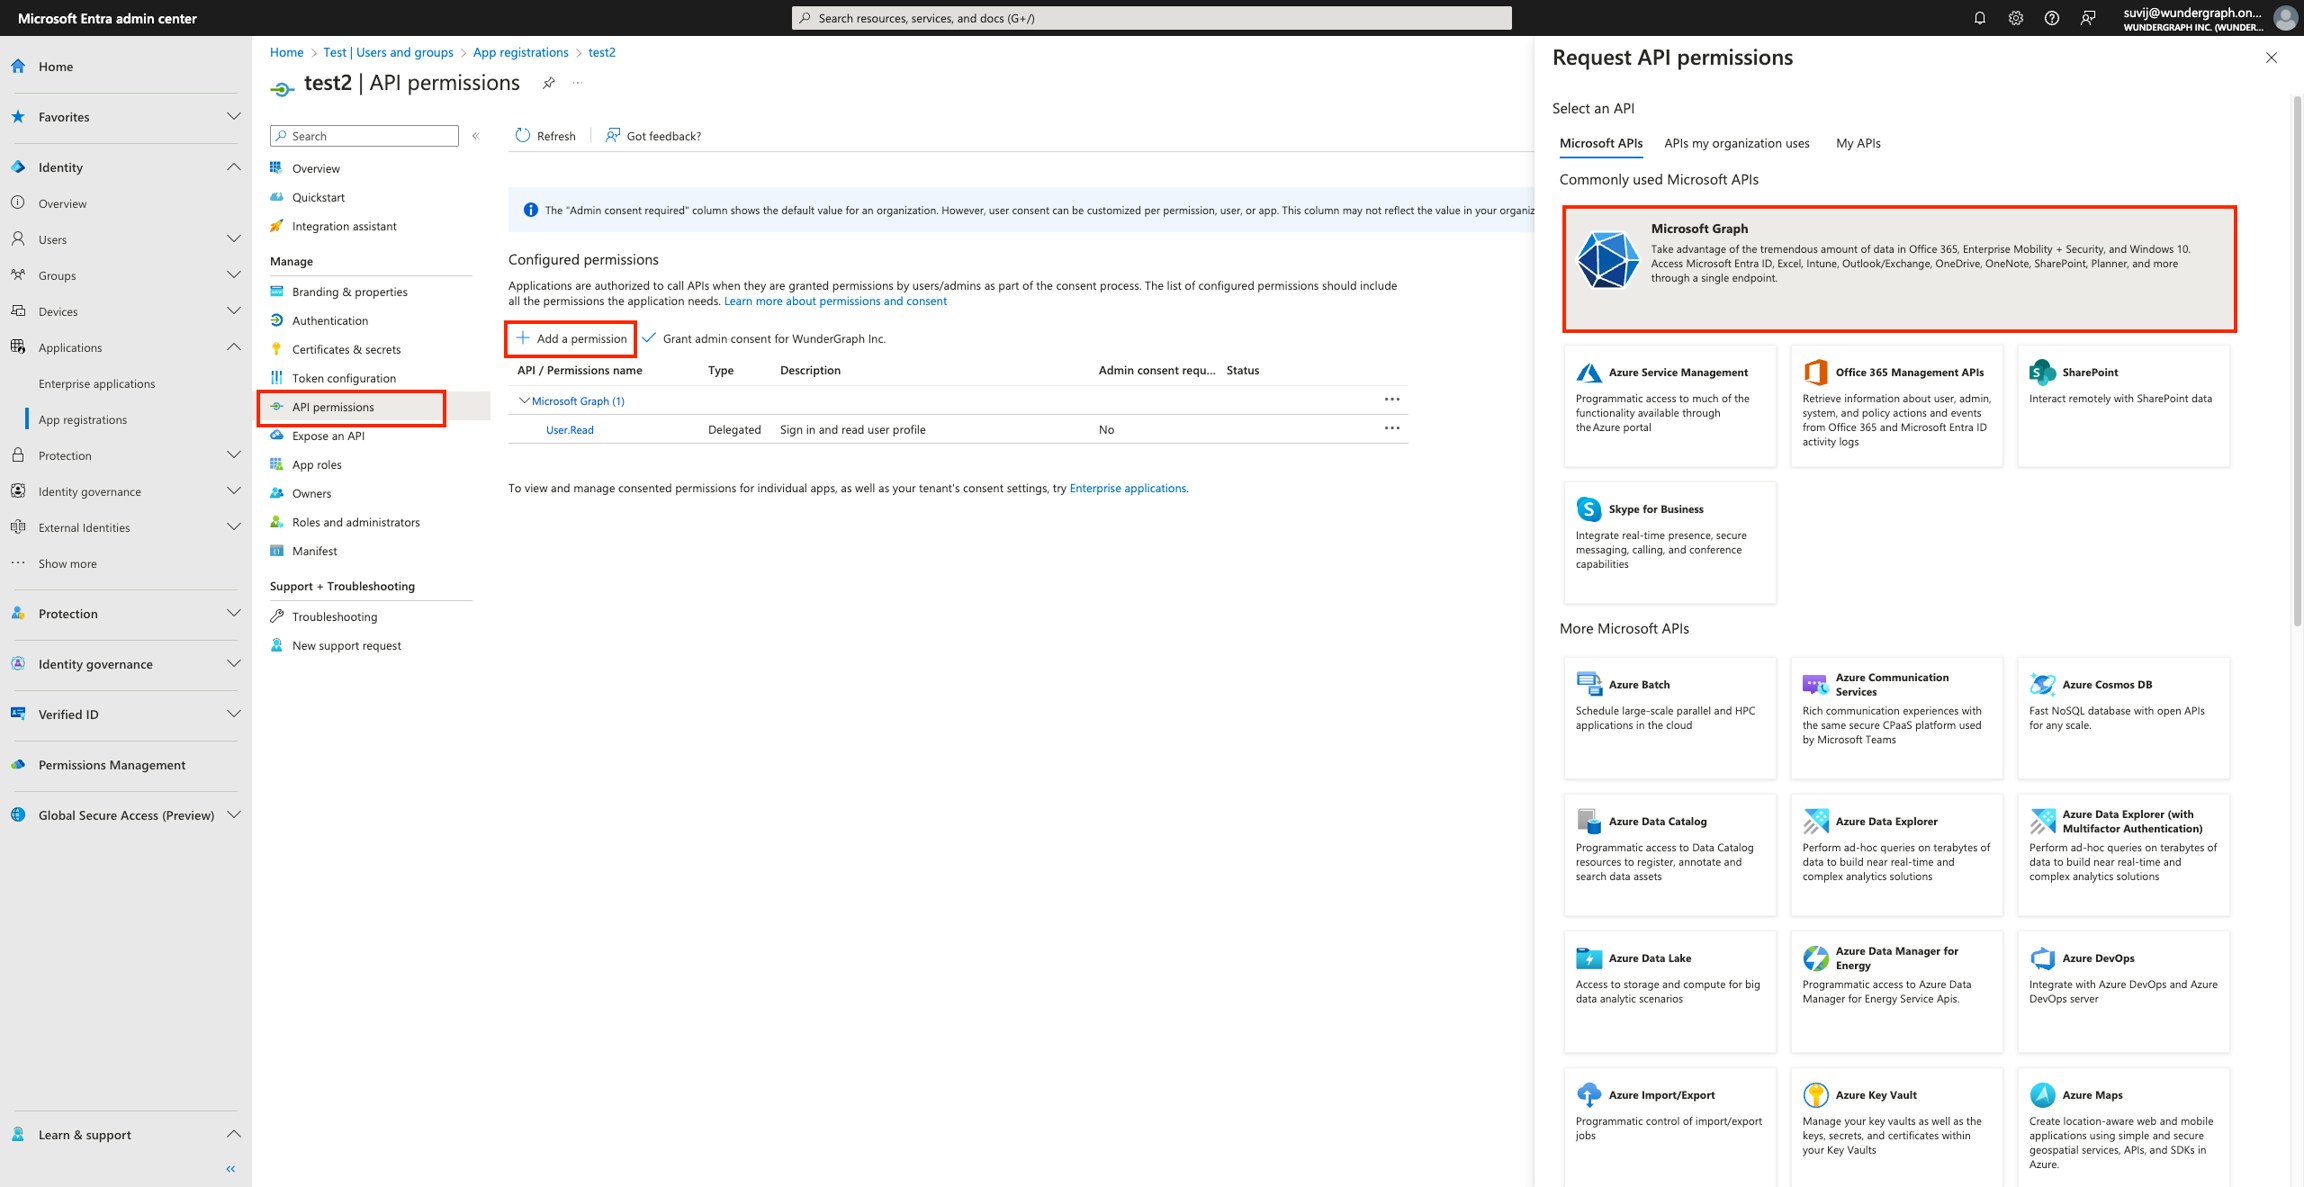
Click on Microsoft Graph, and then on Delegated permissions, select email, openid and profile and then click on Add permissions.
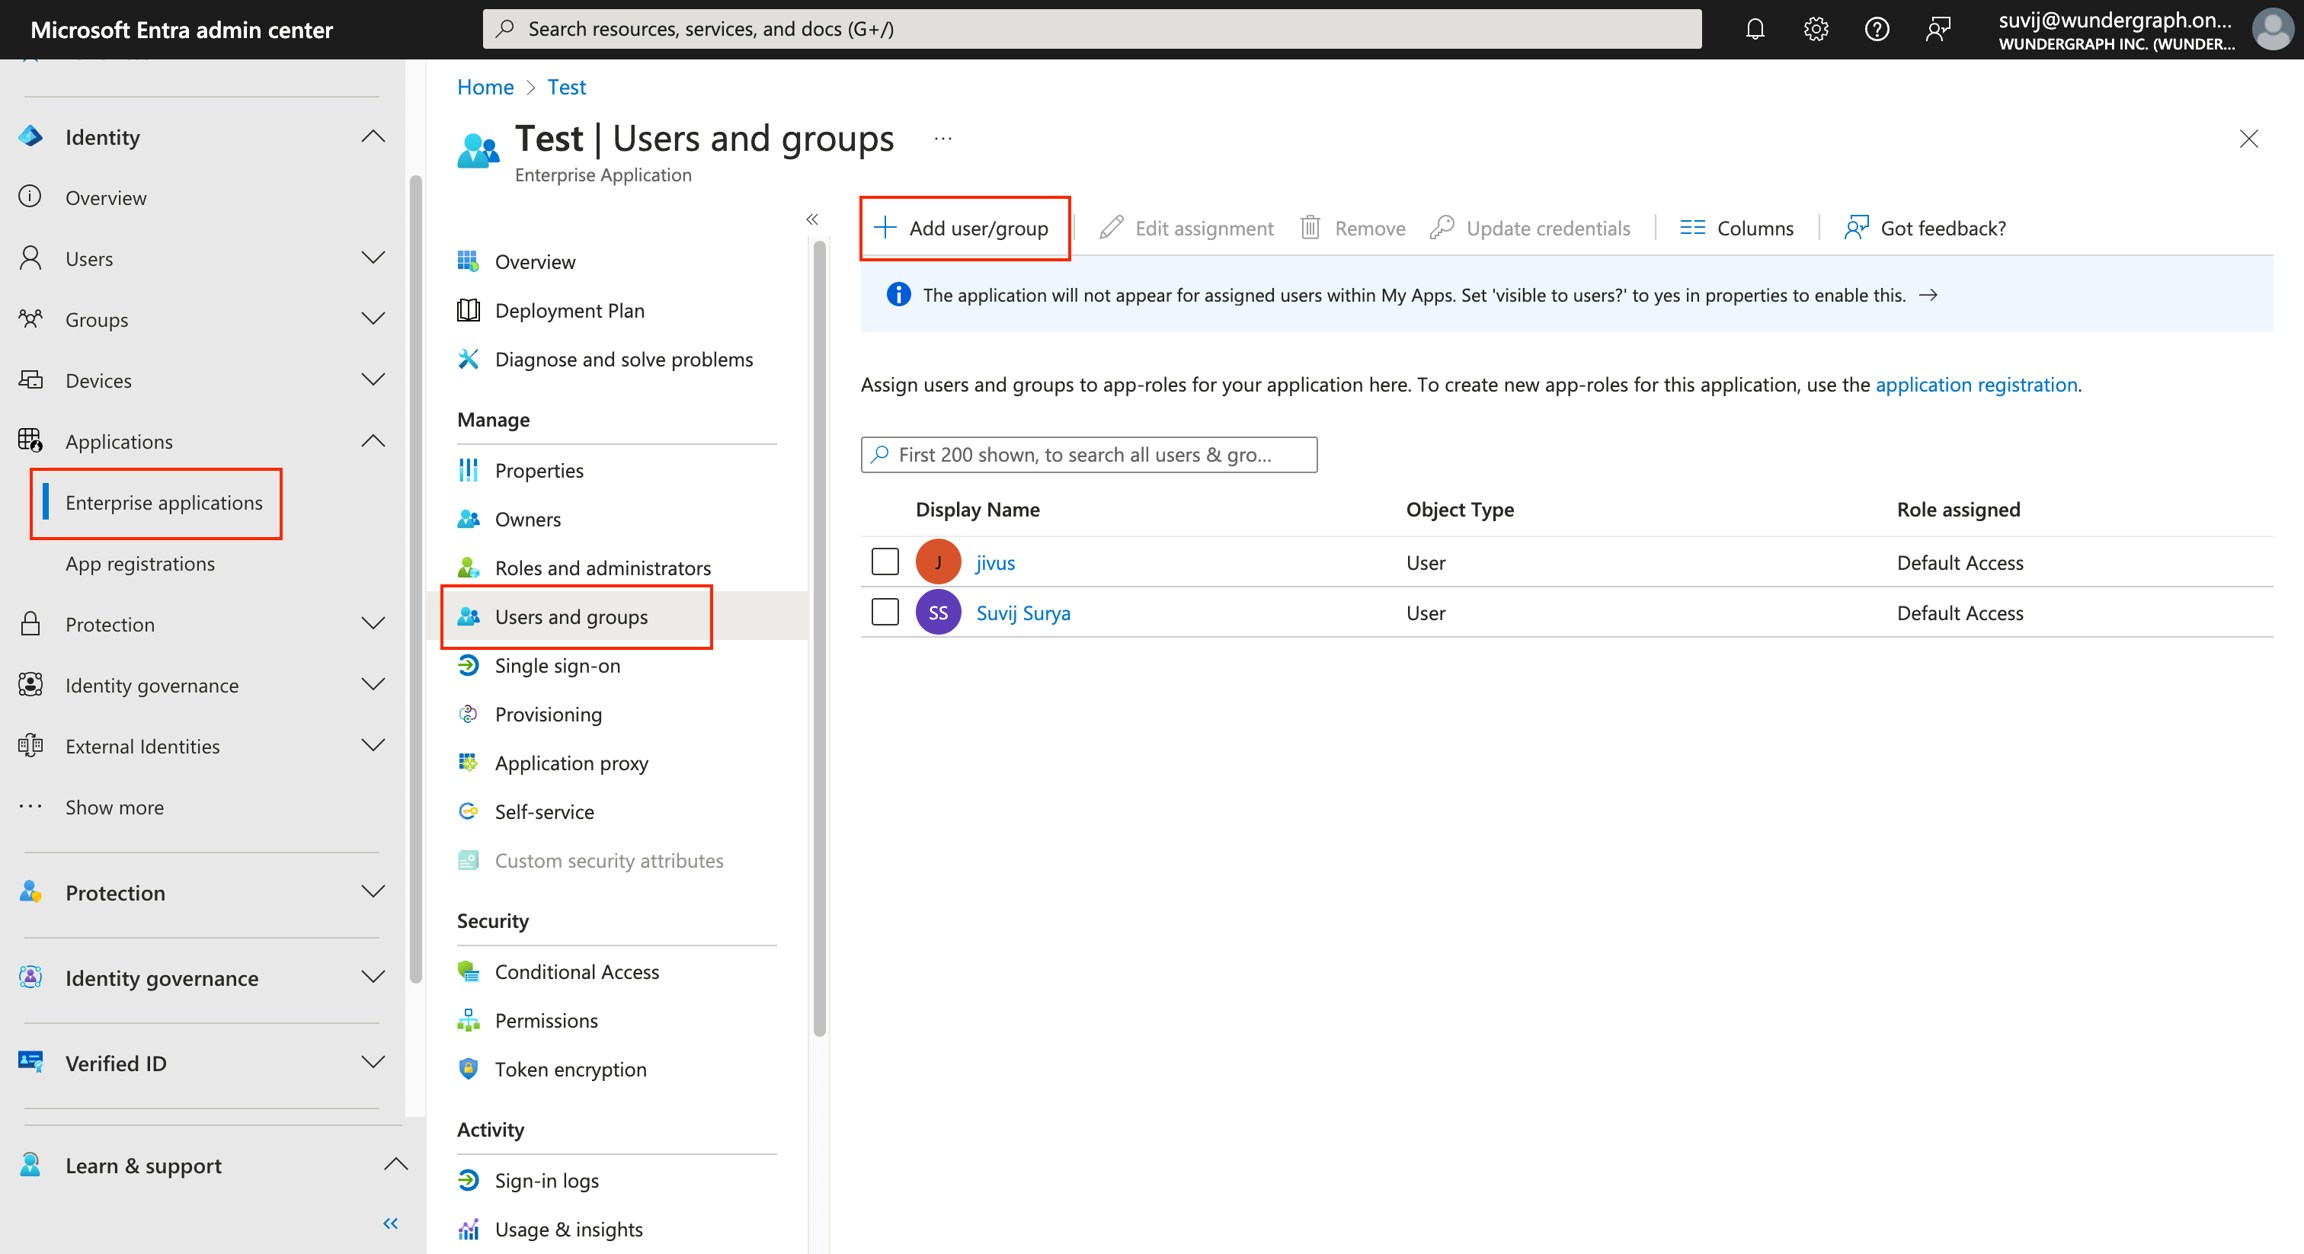
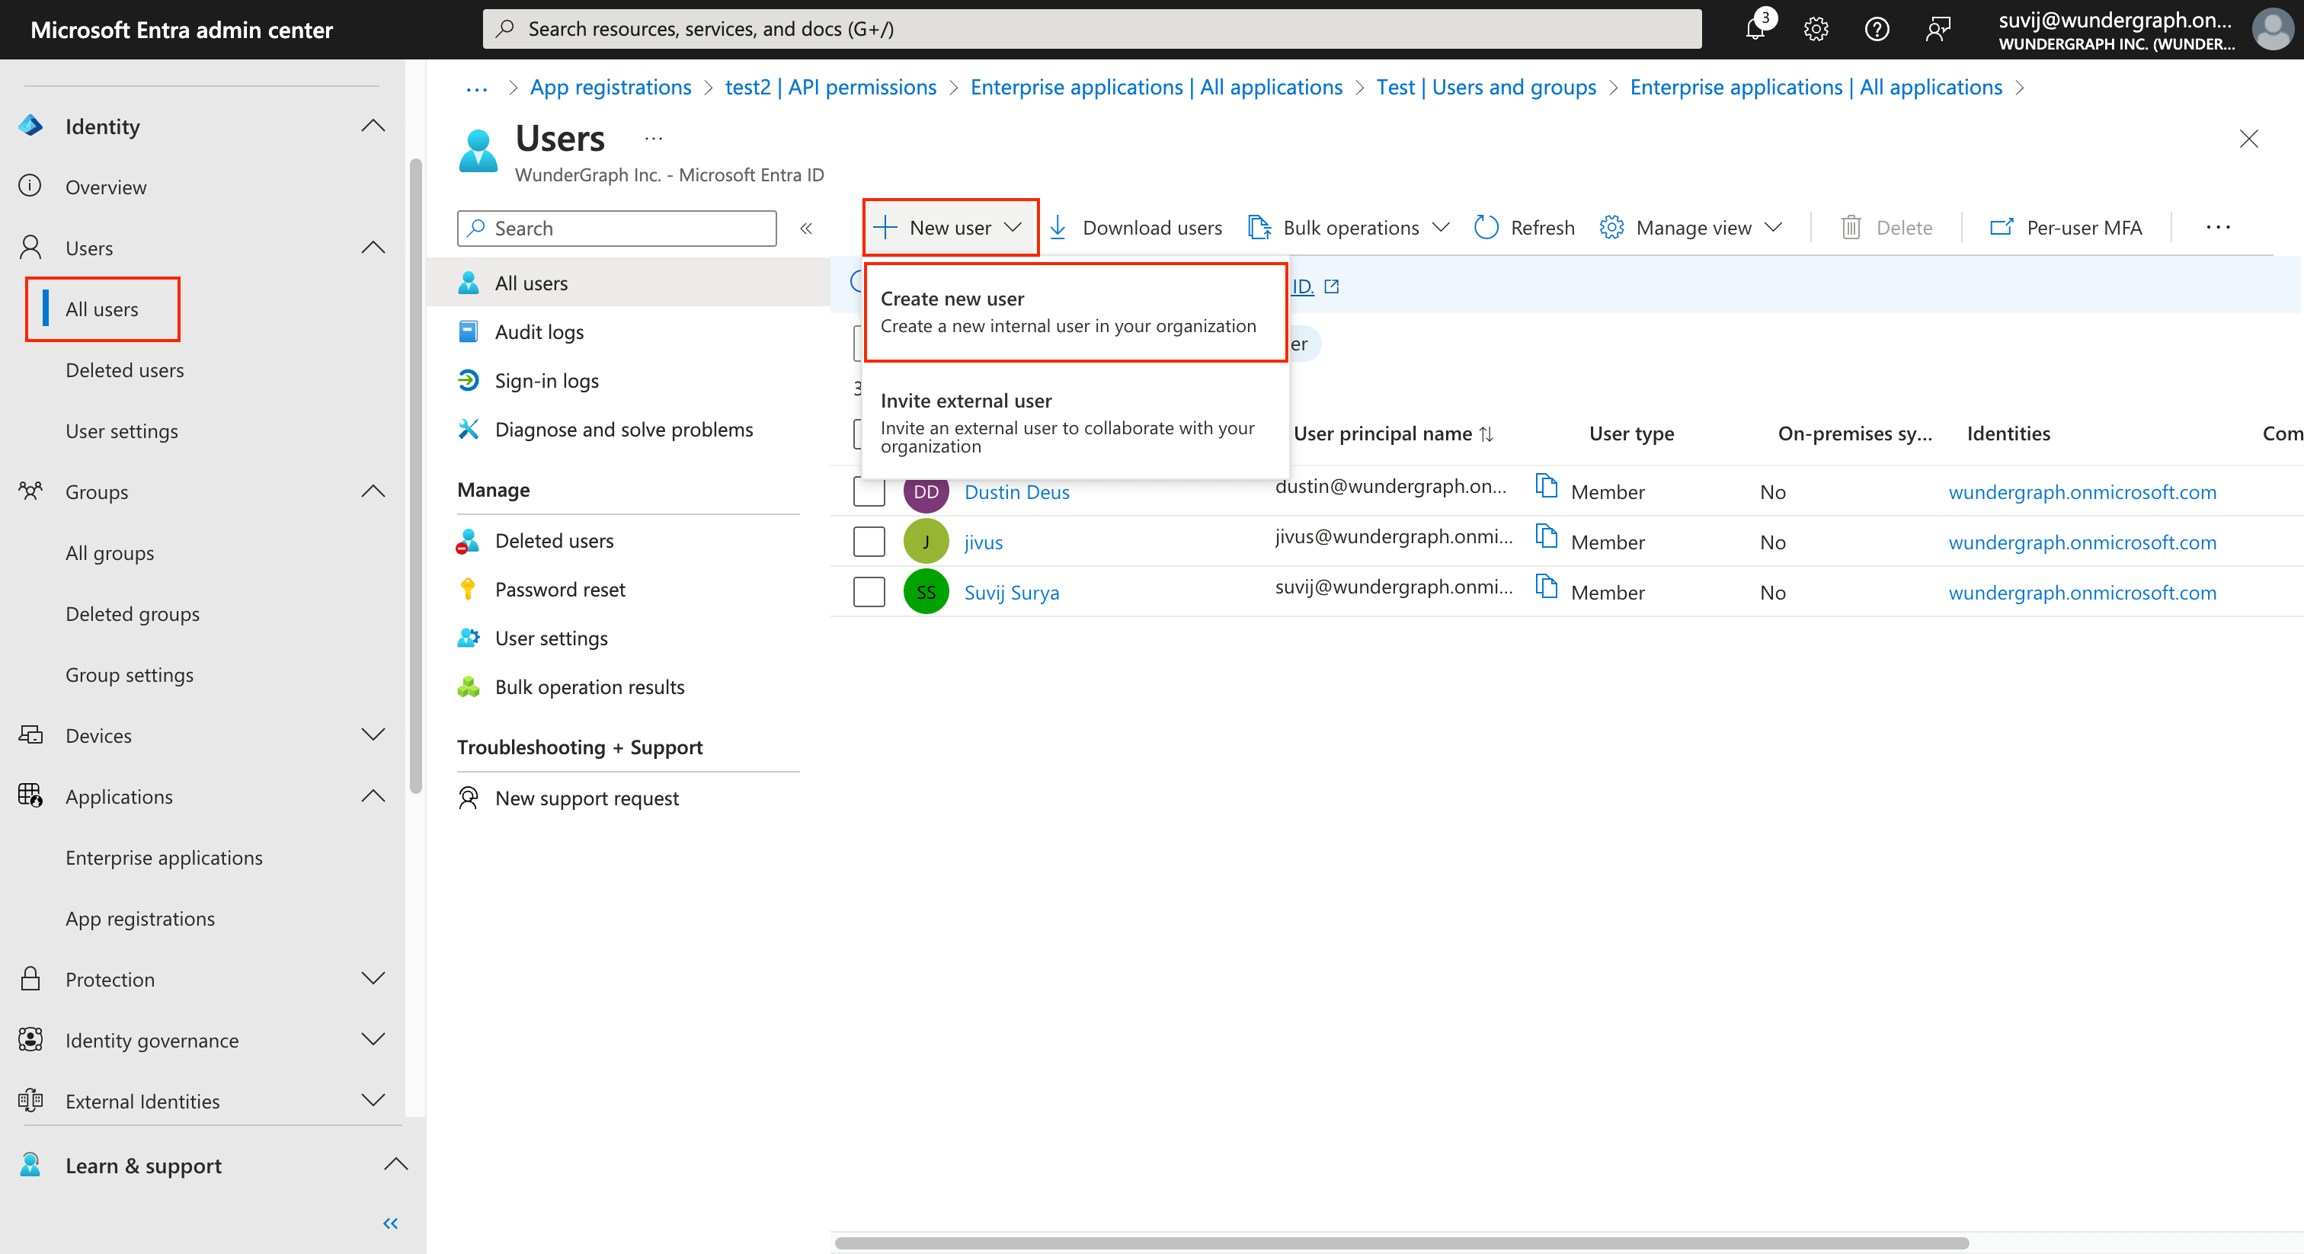
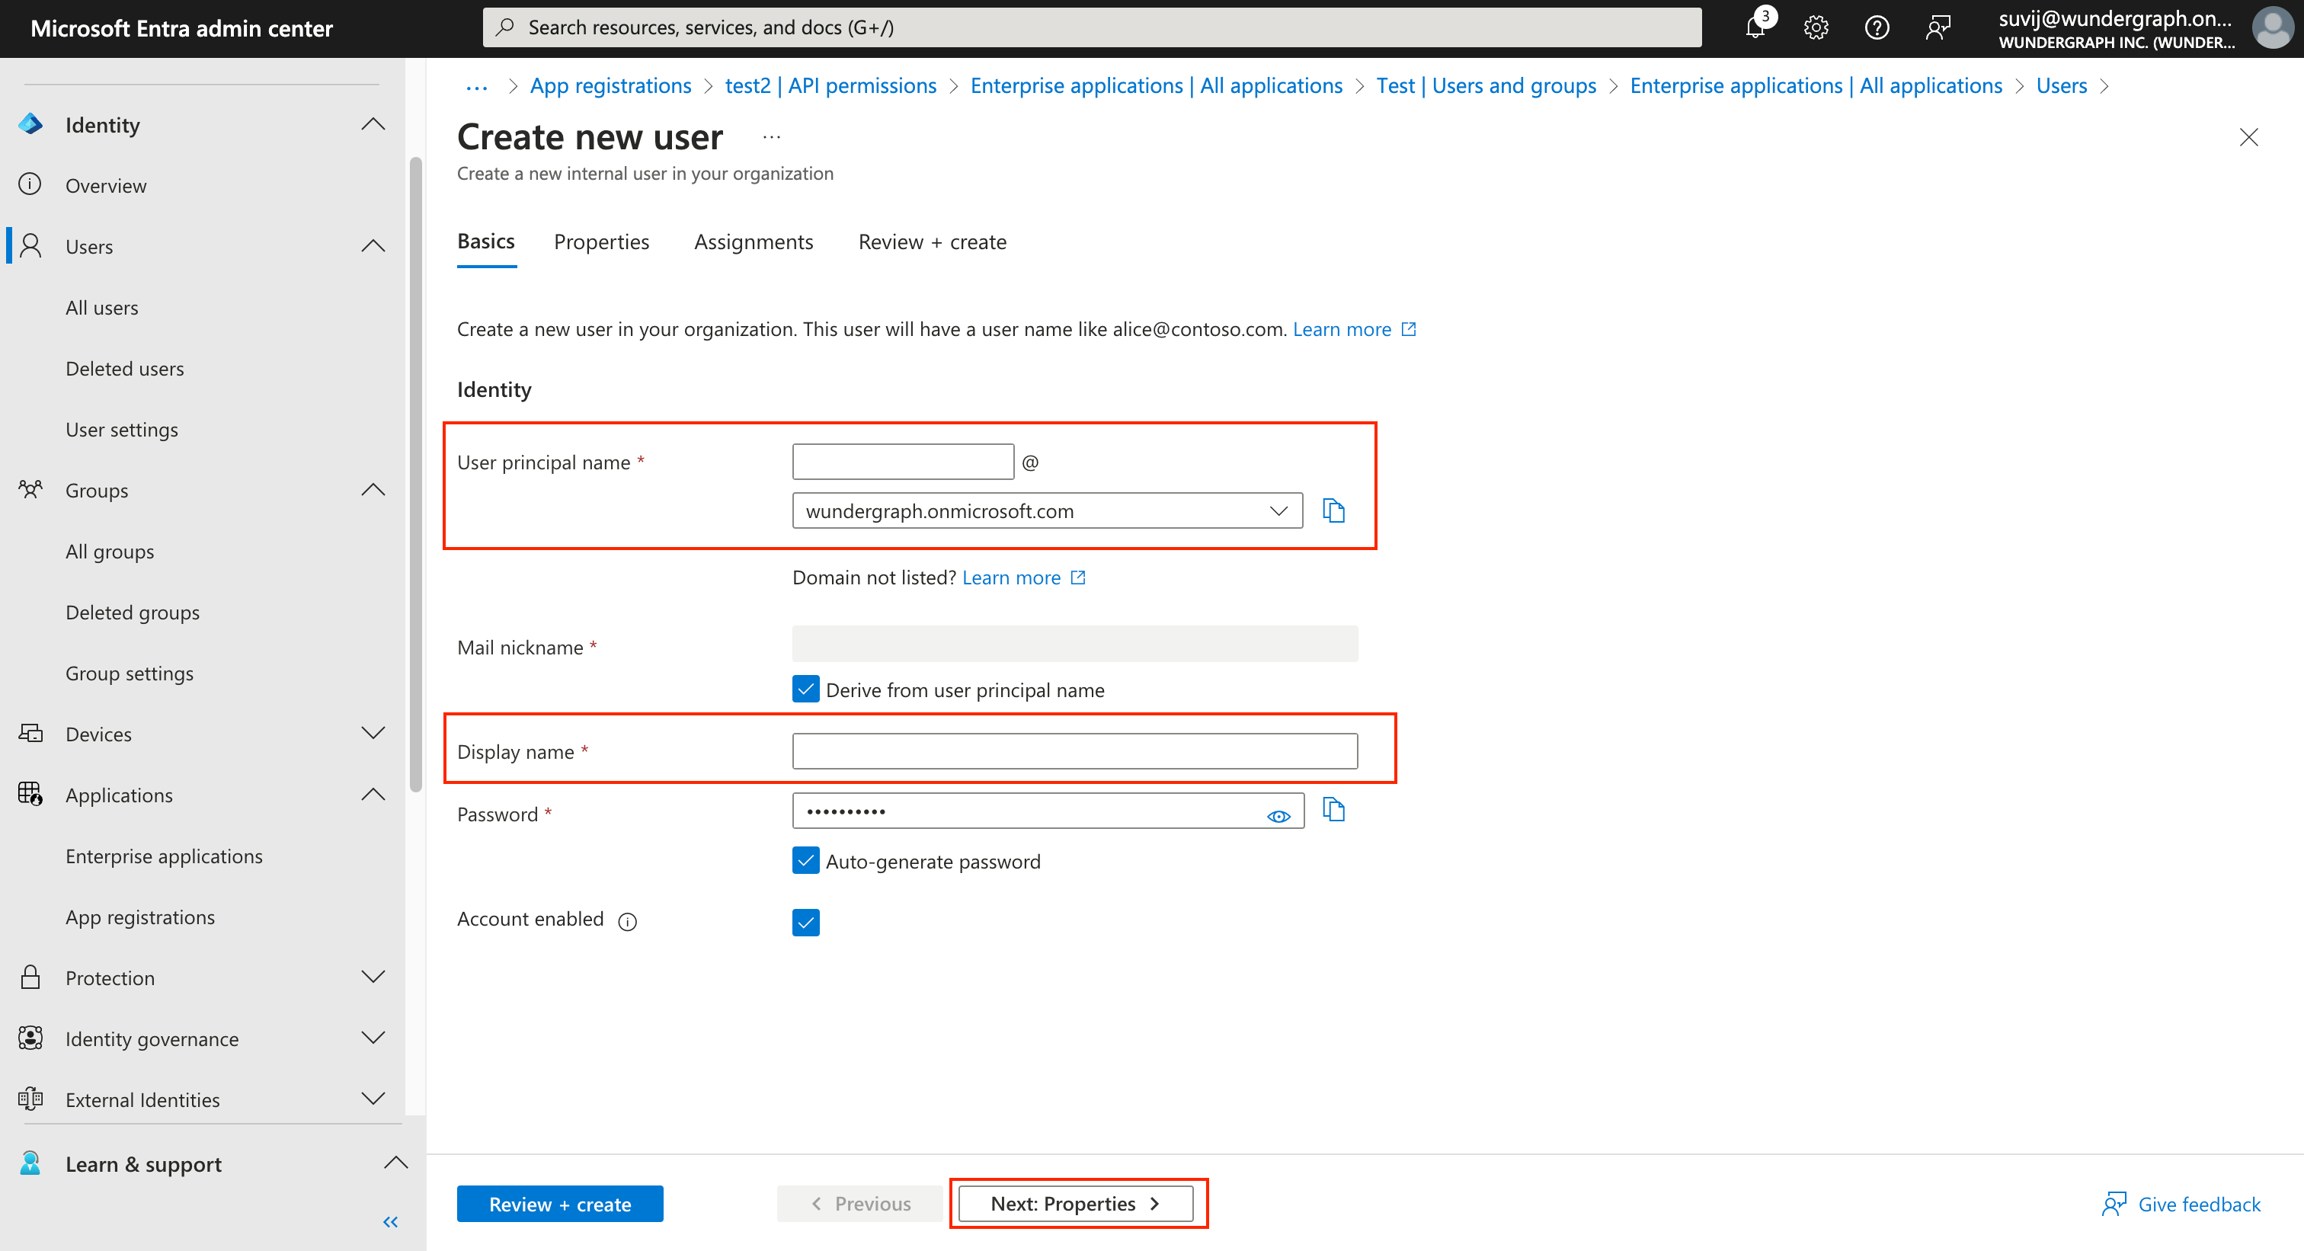
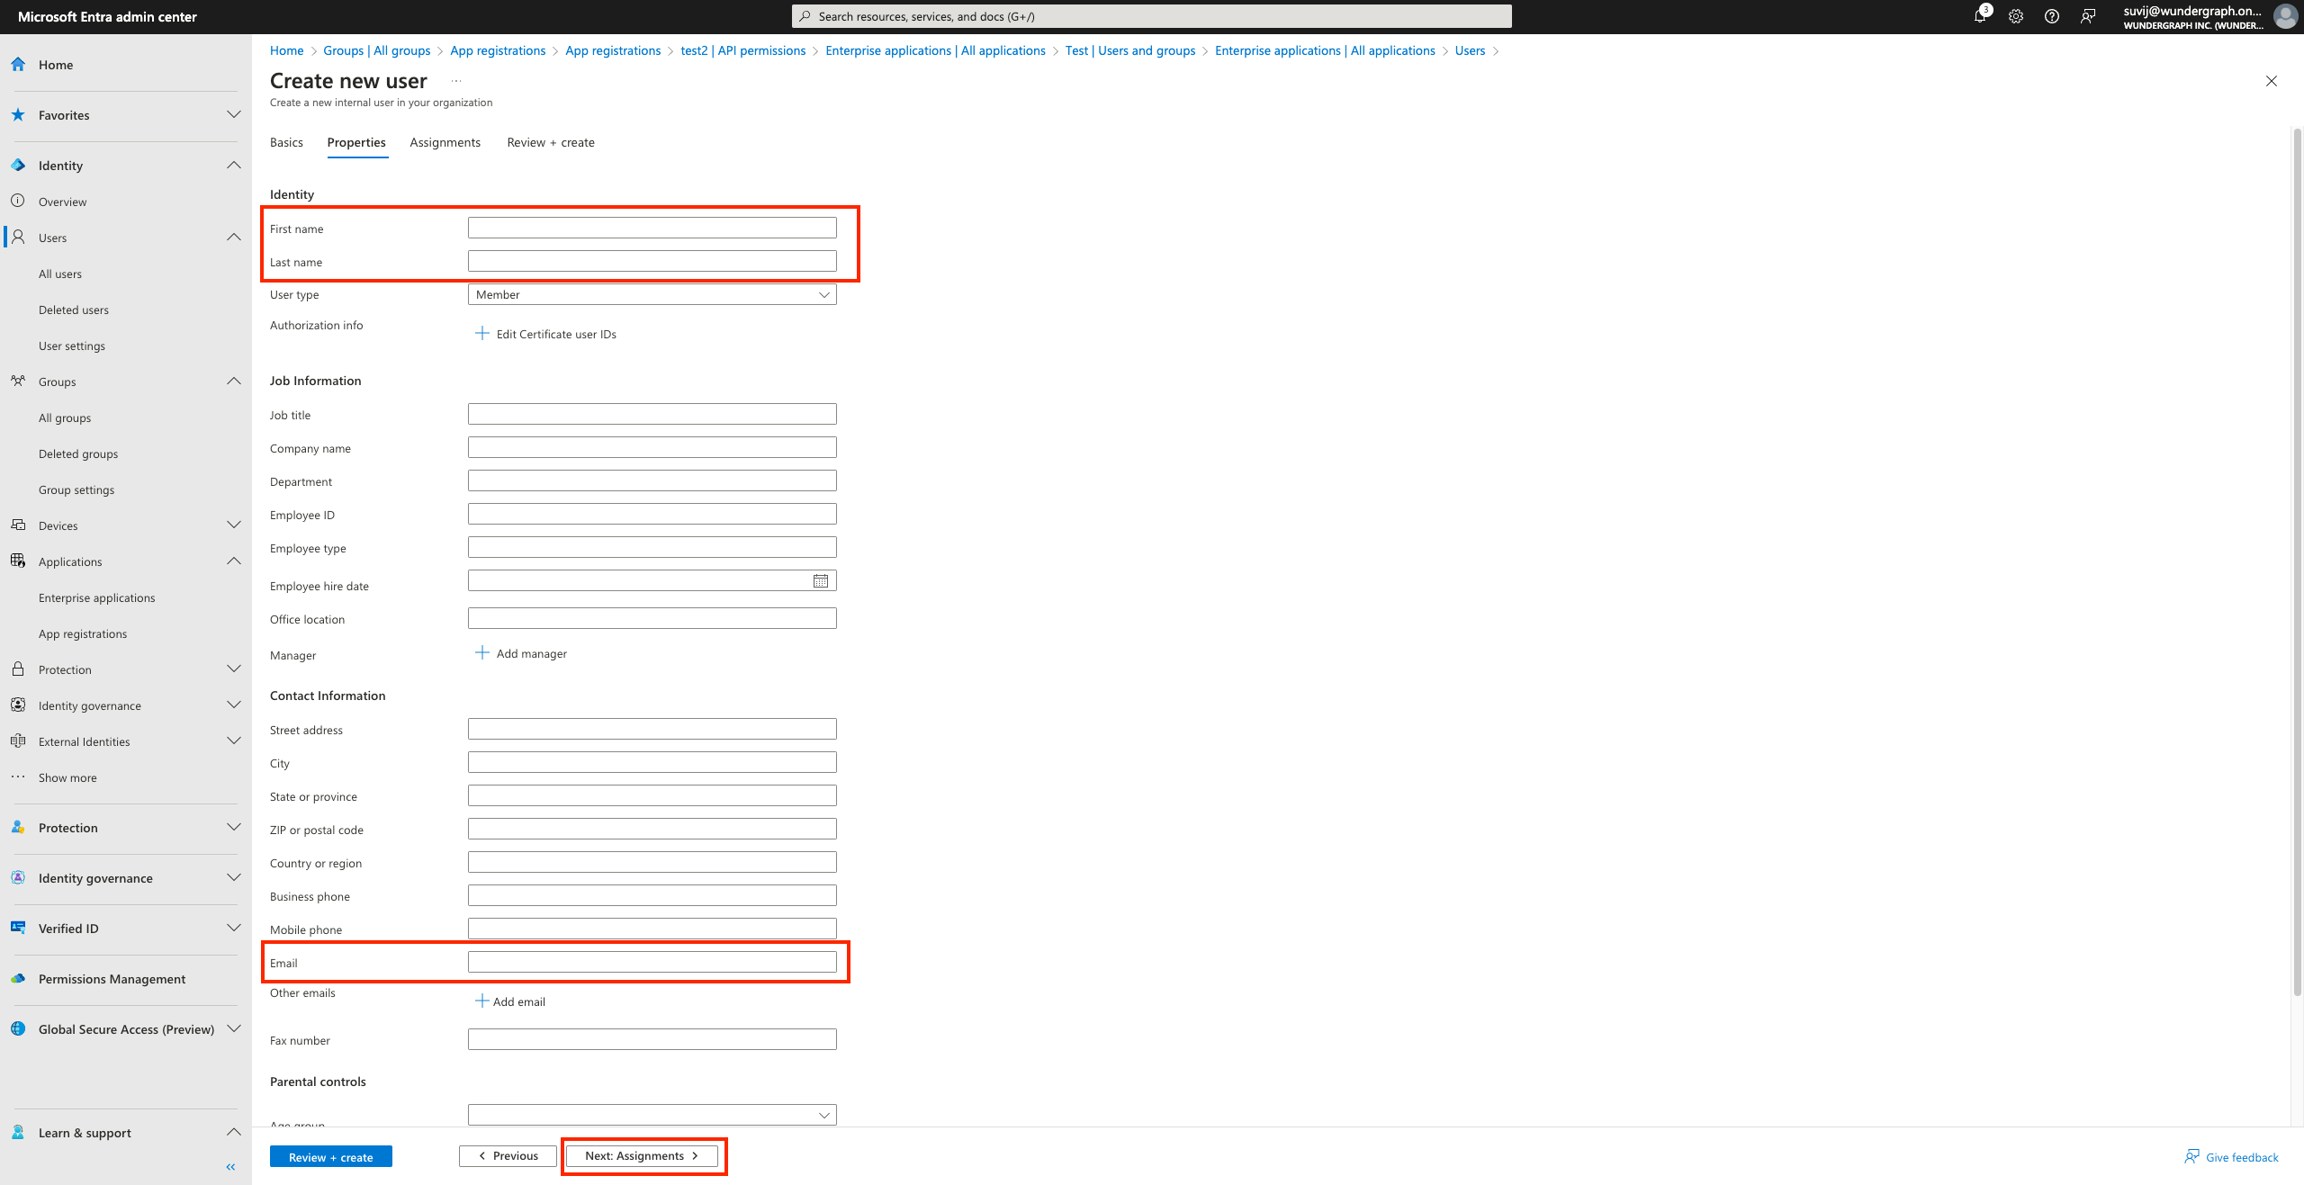
Please make sure that the users added to the application have an email.Steps to add a user:
