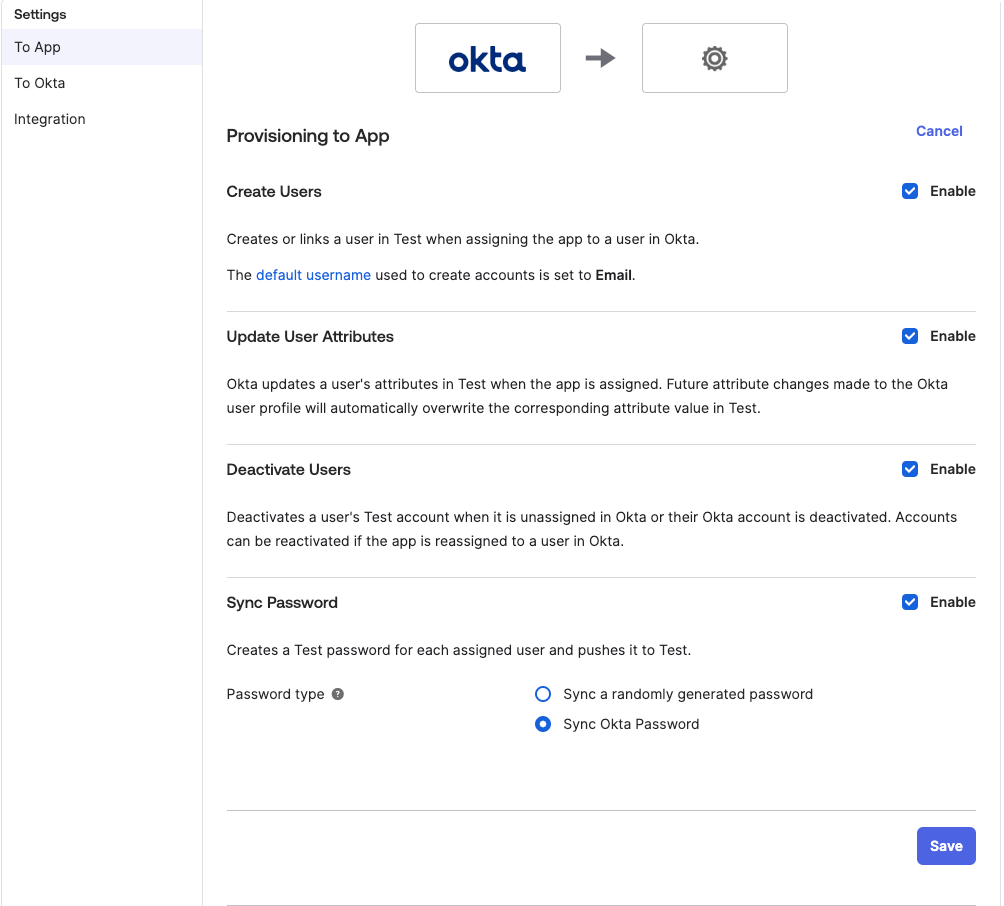
Steps to set up SCIM with Okta
Set up the password policy (password should contain at least one number and one symbol), if using the Classic Engine on Okta follow the below steps, or if using the OIE engine,follow the steps as mentioned in this ****Okta guide.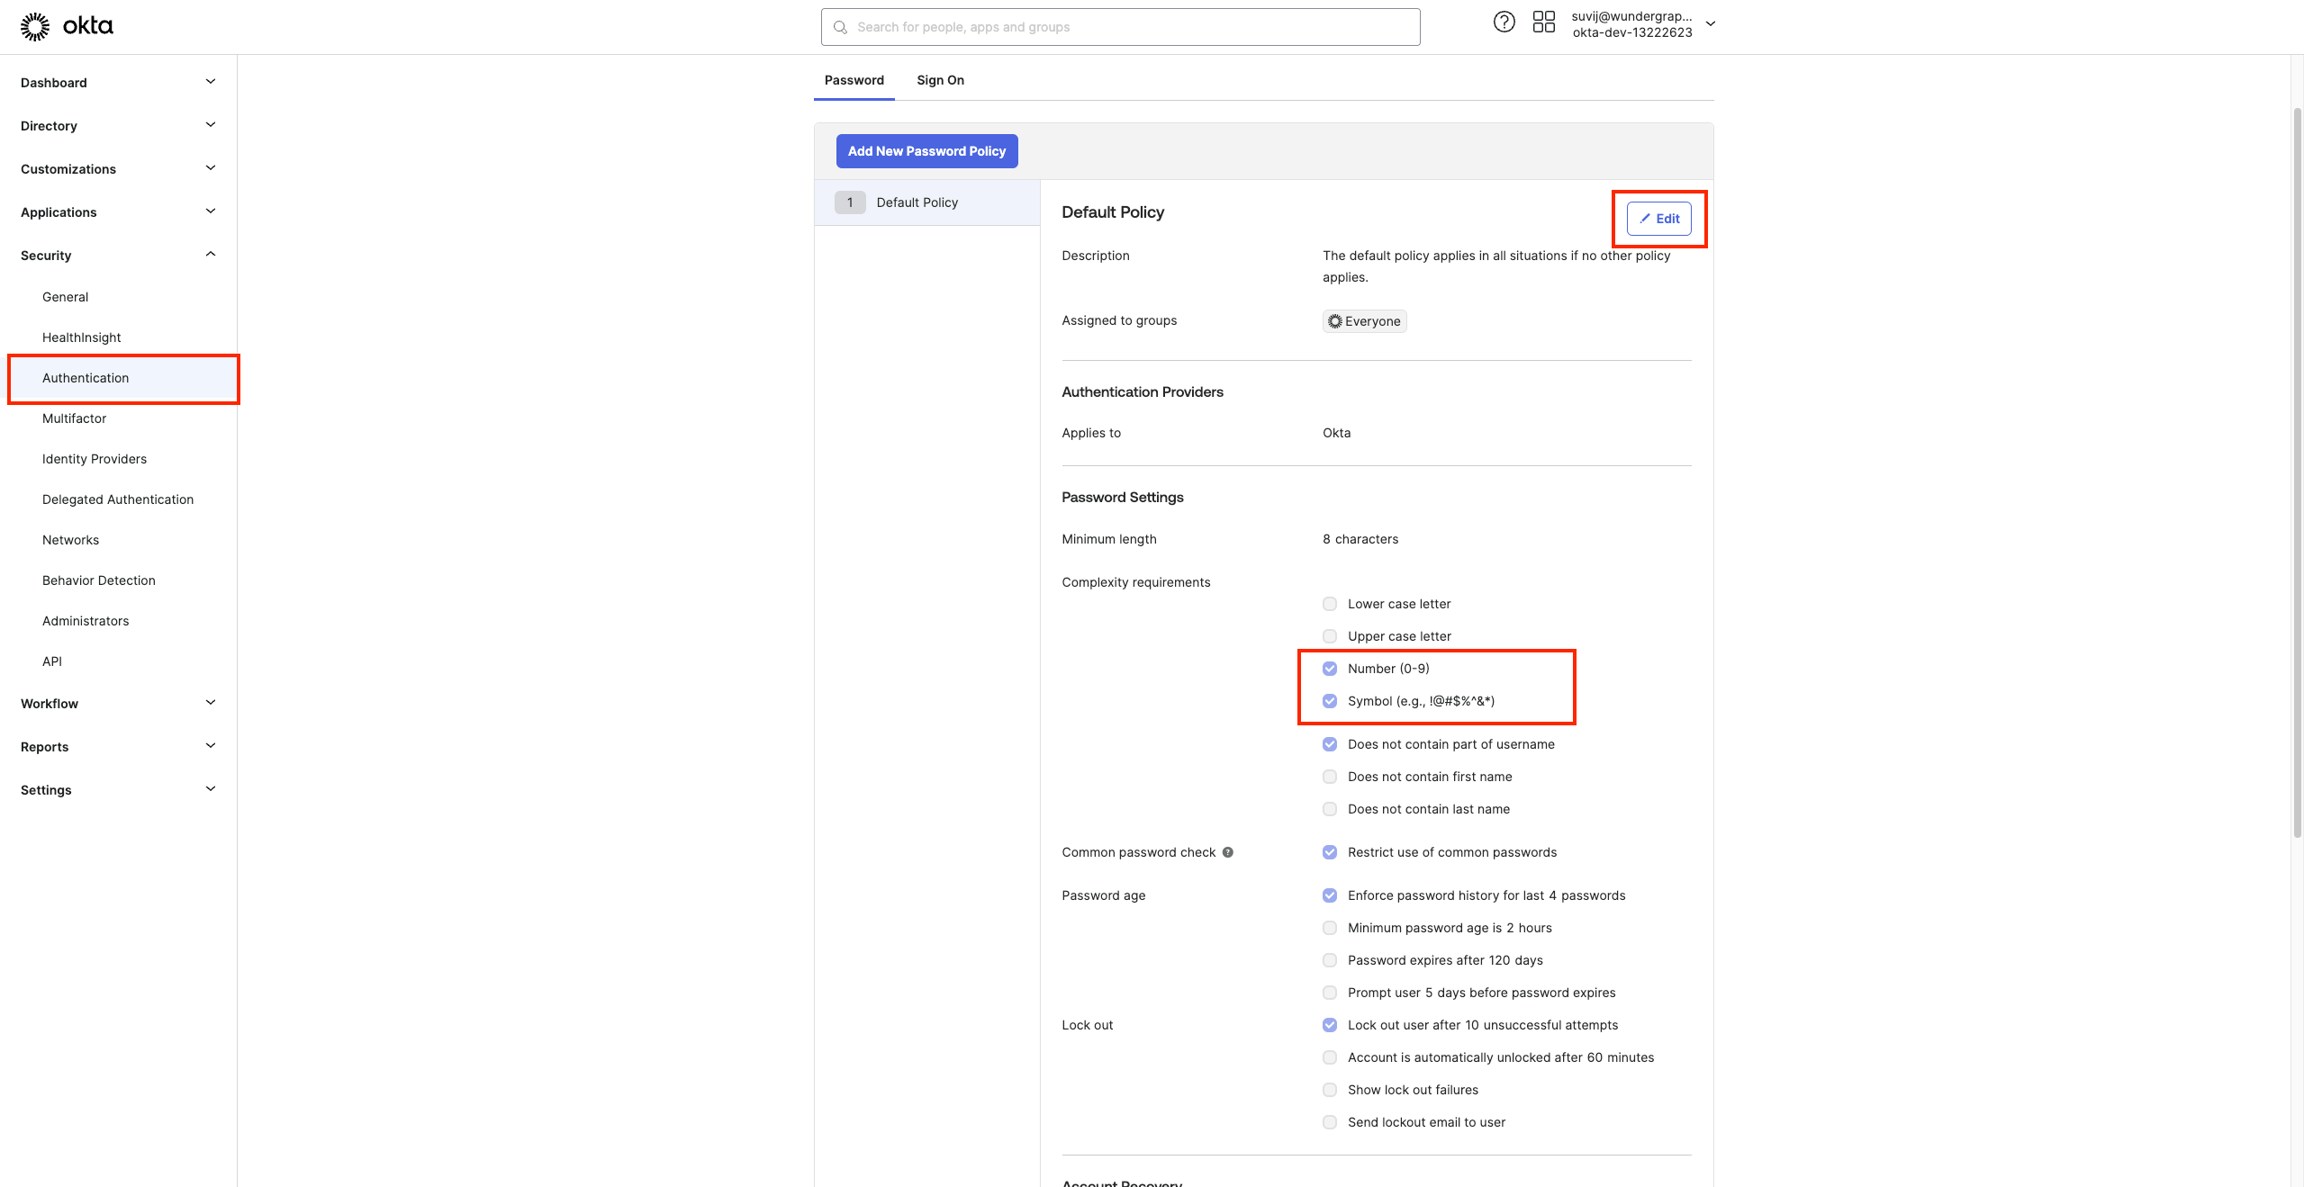
- Navigate to Security -> Authentication on your Okta Administrator Dashboard.
- Click Edit and update the password policy by enabling Number and Symbol, then click on Update Policy.

Select Administrator sets username, user sets password and for Application username format under Credentials Details select Emailand then click Done.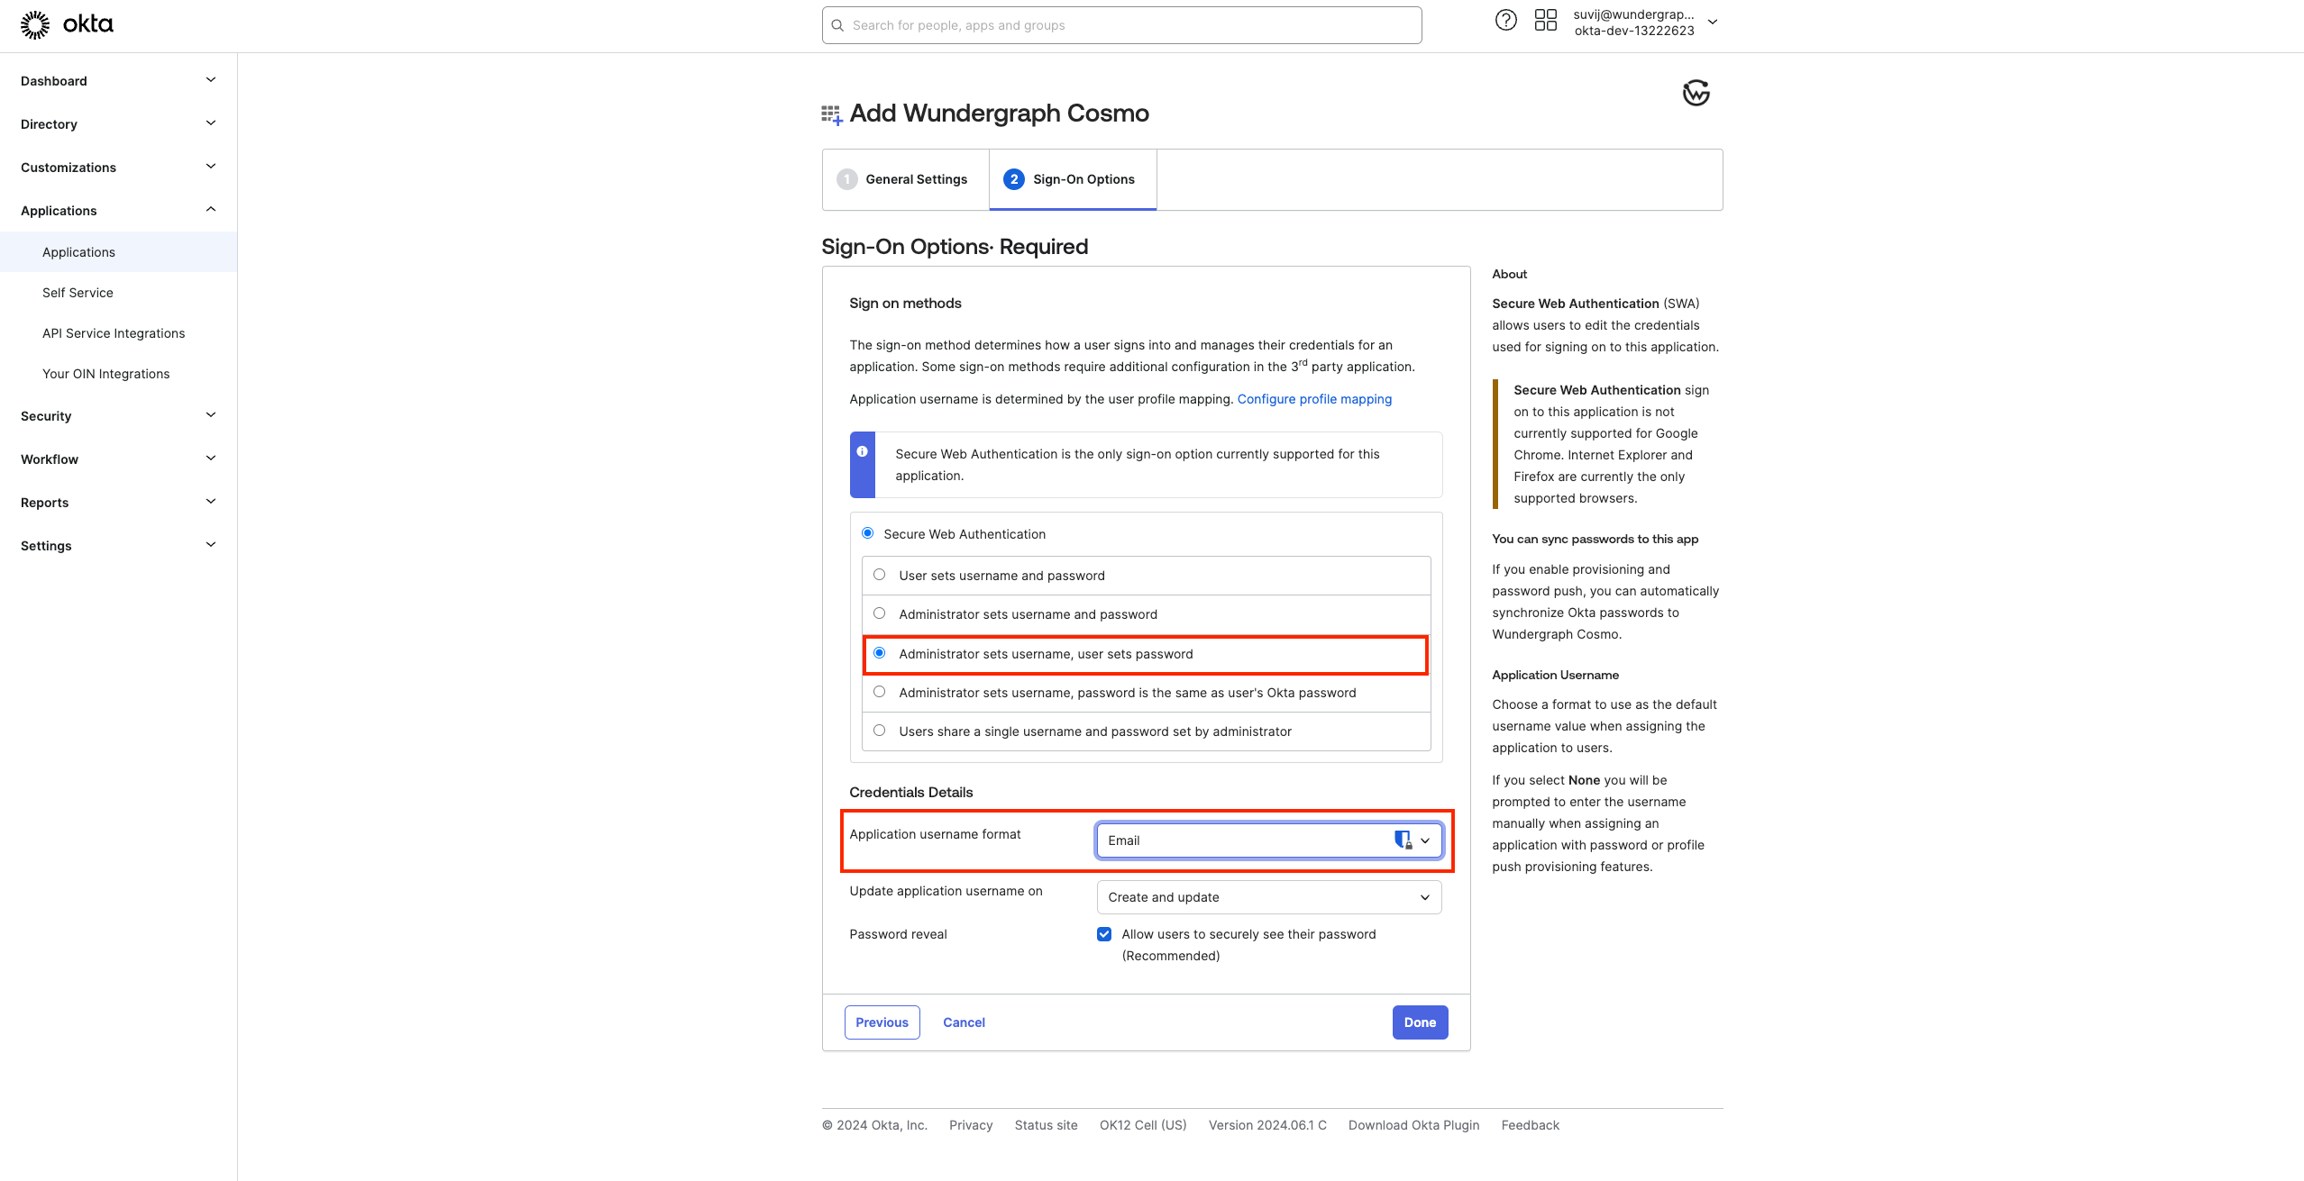

Provide the key with a name, select Never for Expires, then select SCIMunder Permissions, then click on Generate API key.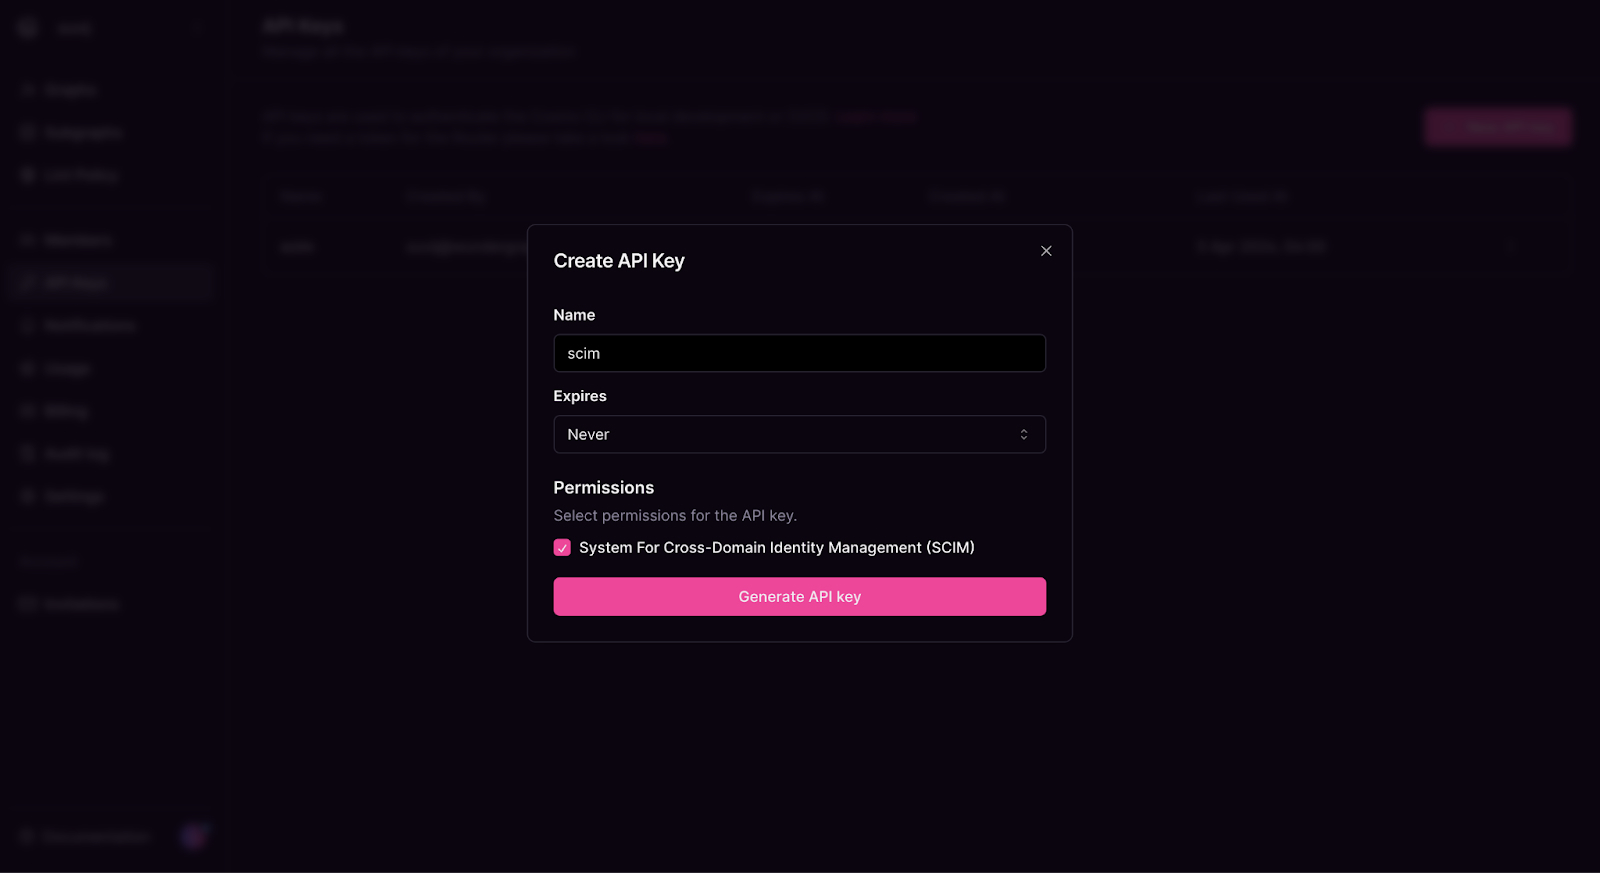

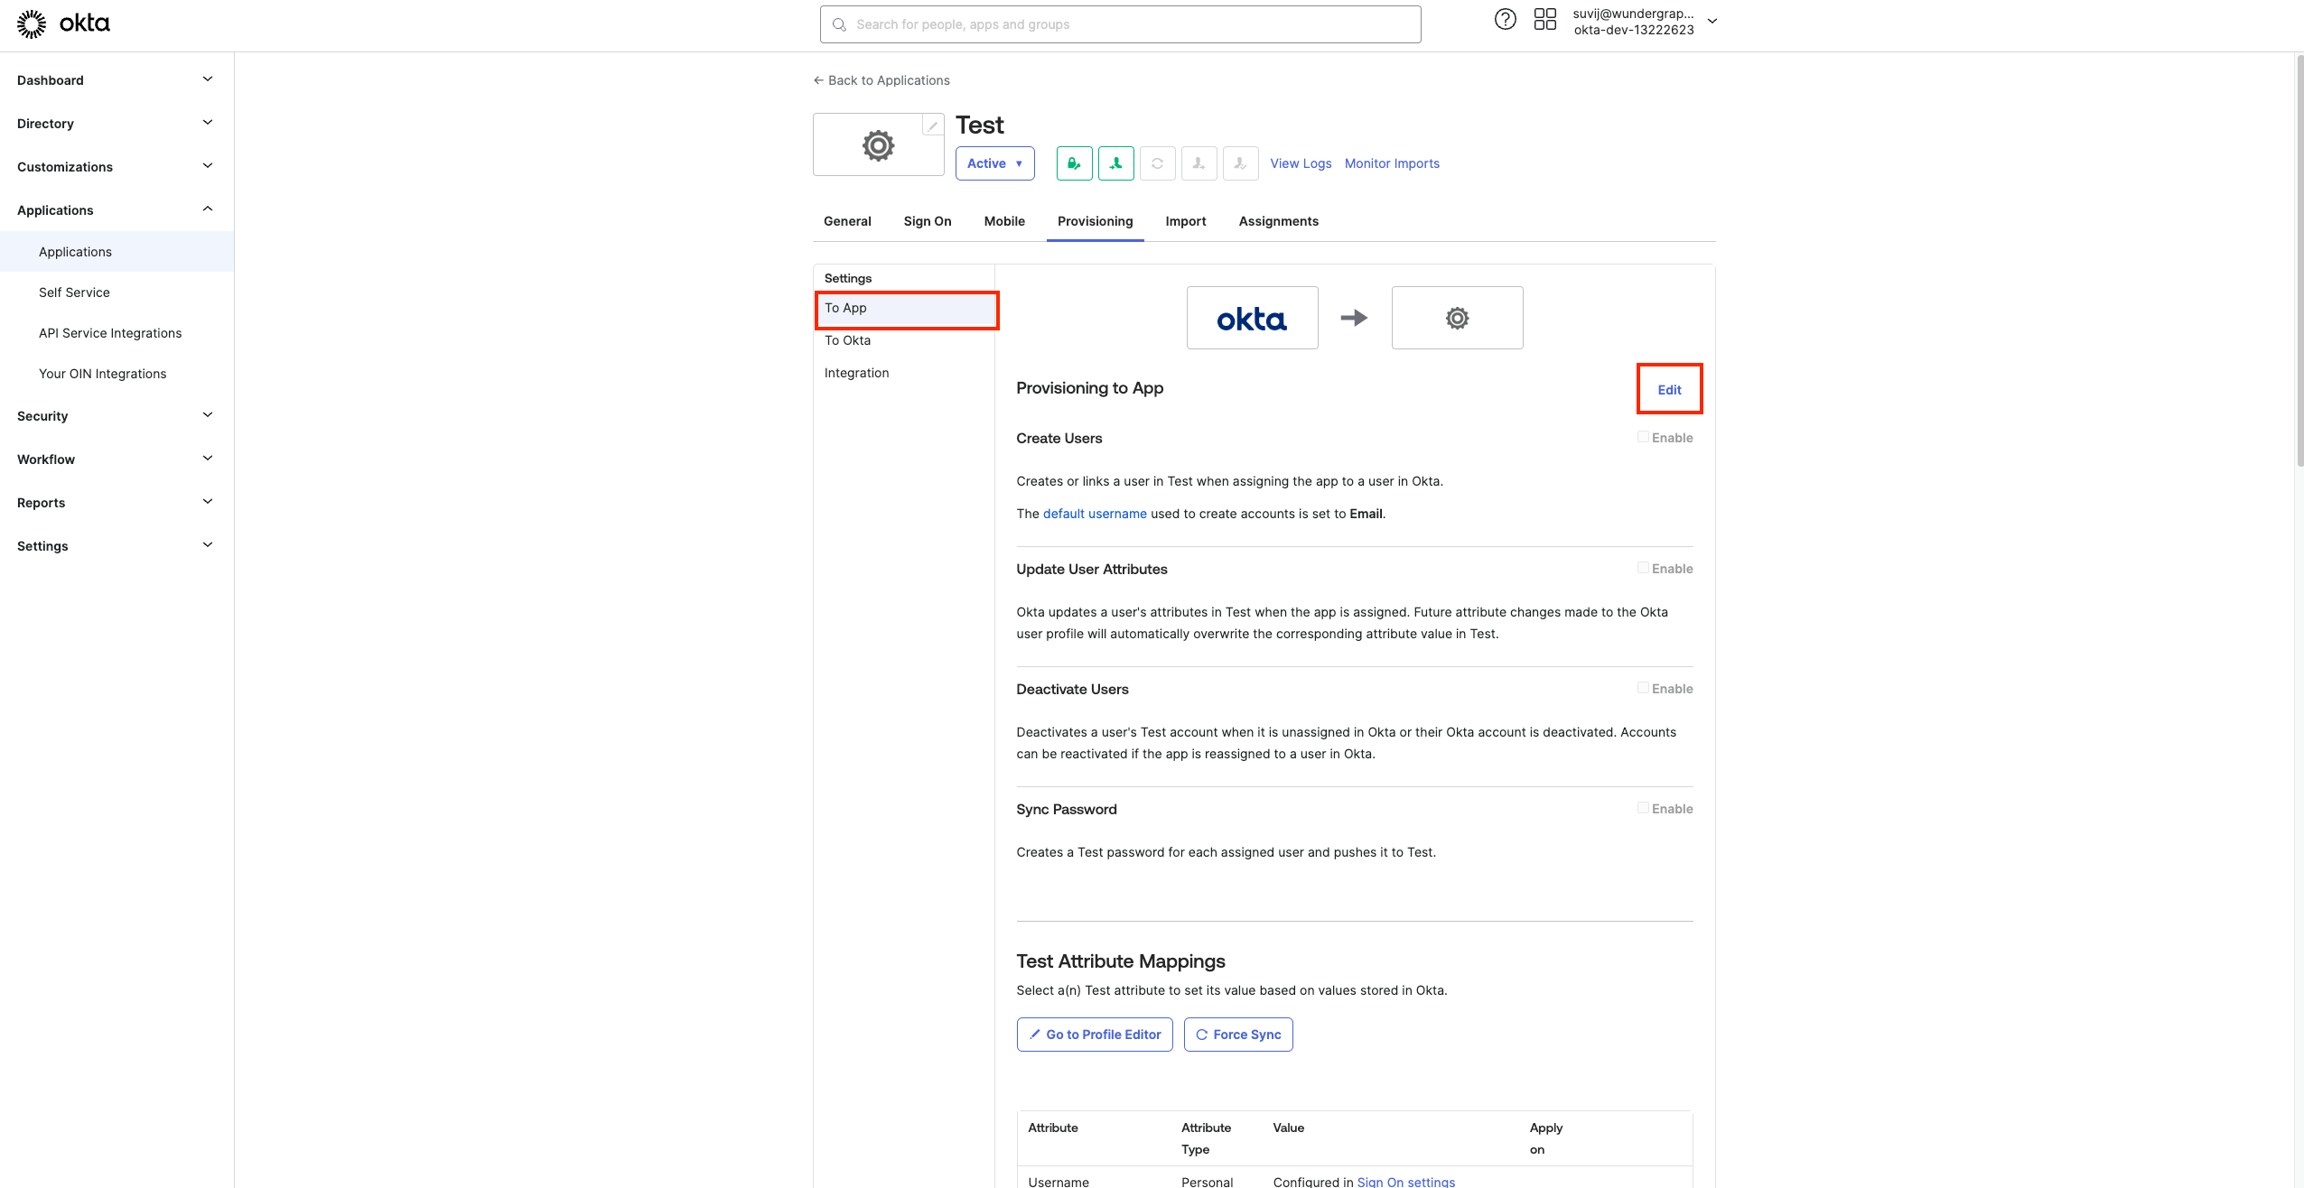
Navigate to the provisioning tab of the app created on okta, then click on Configure API Integration.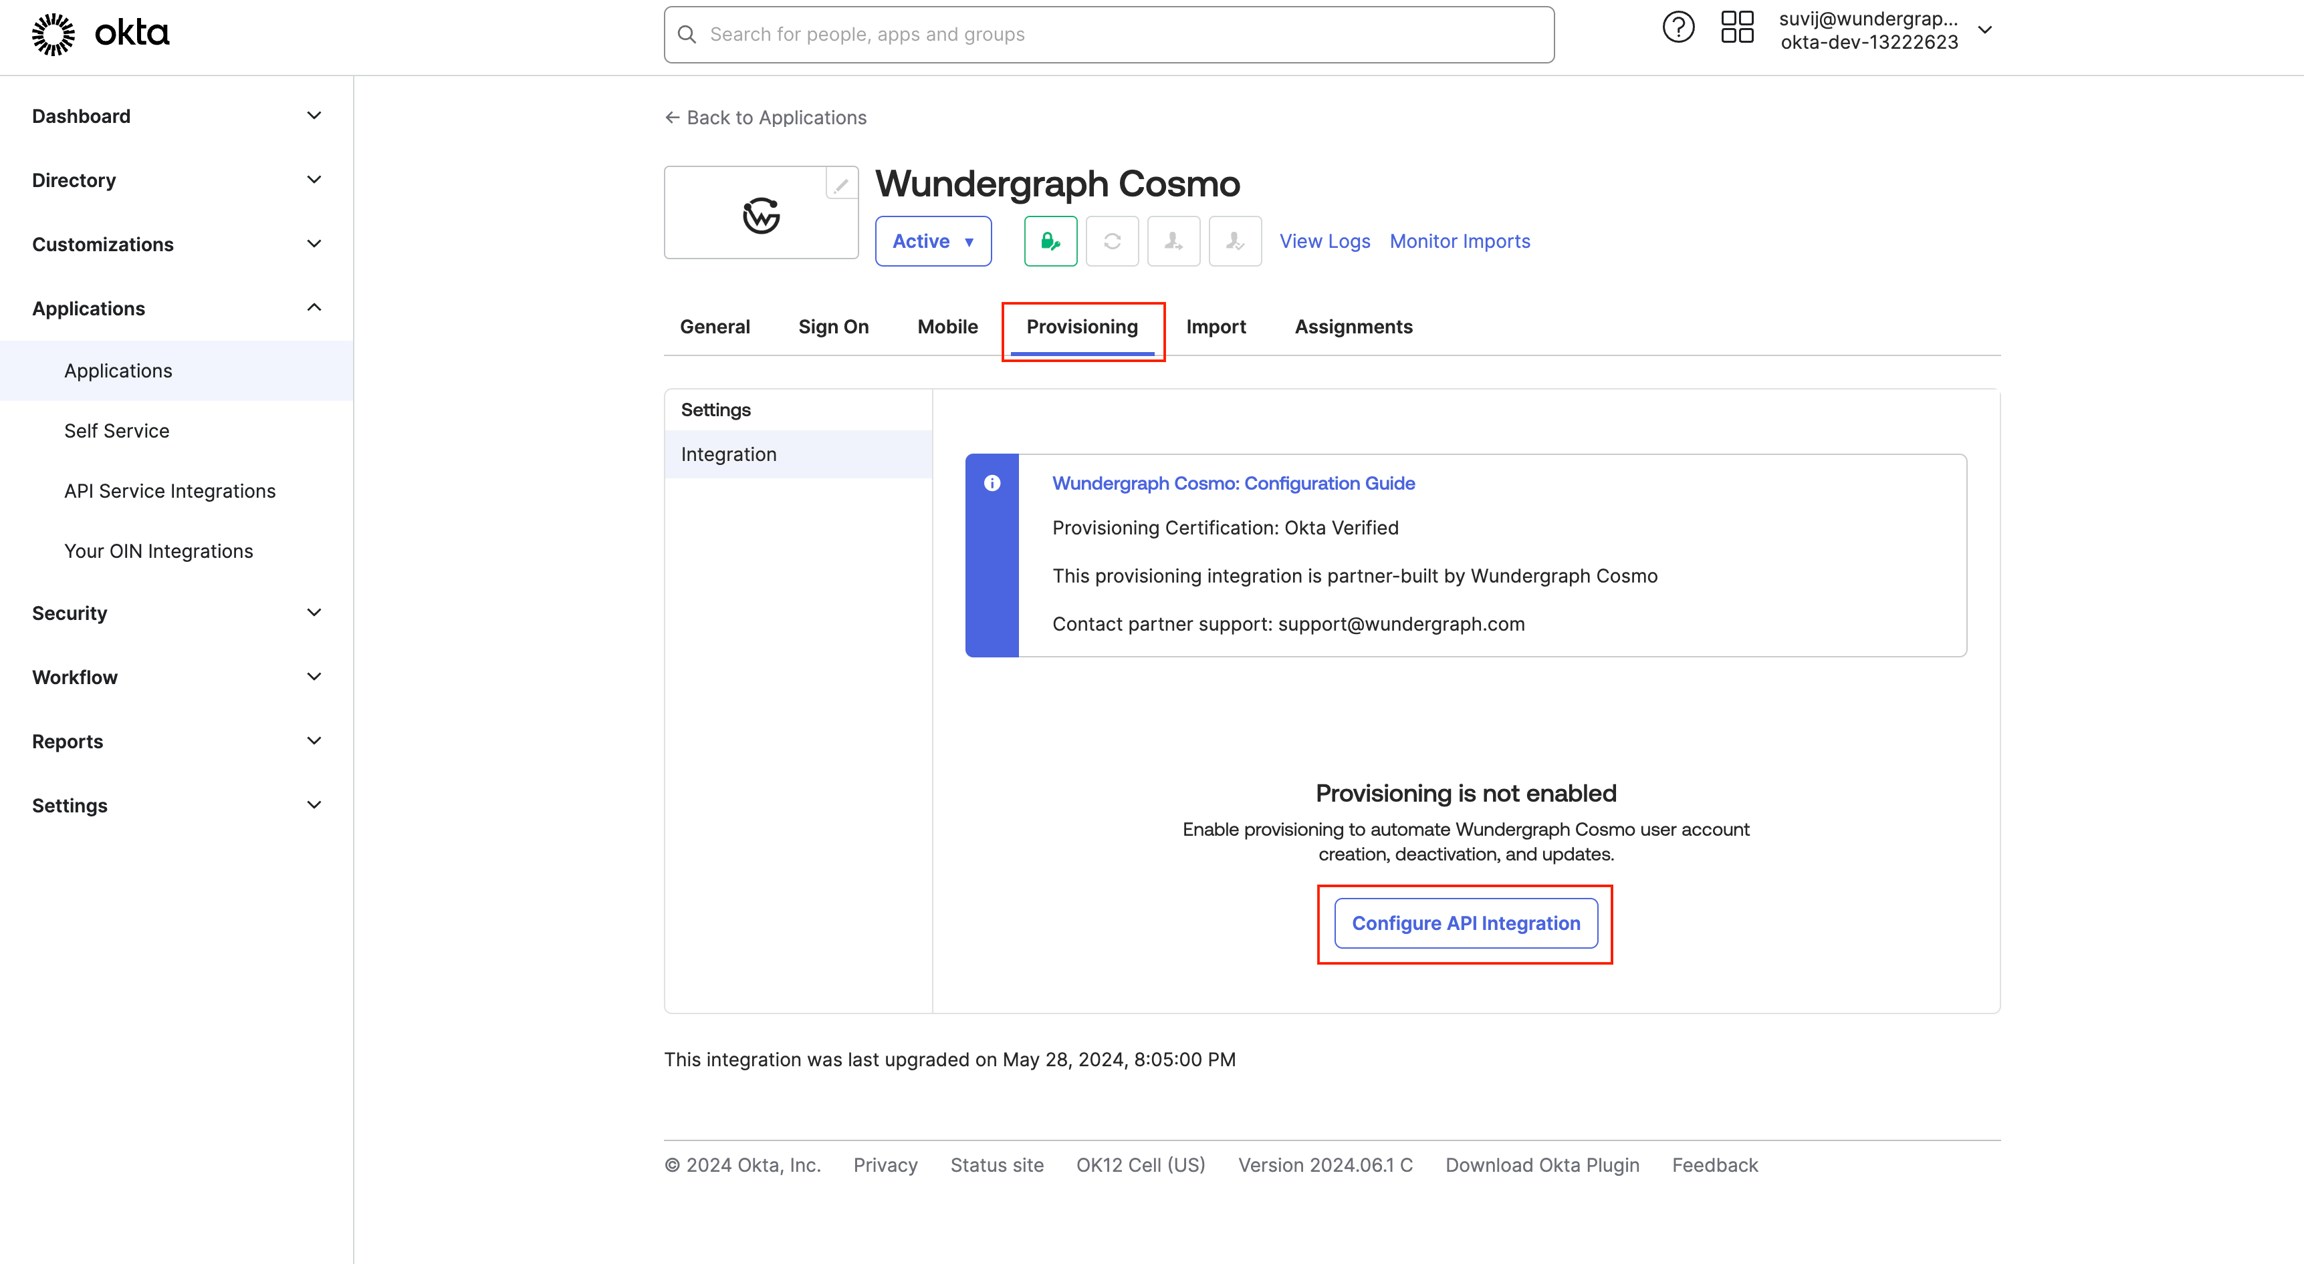

Check the Enable API Integration and then populate the API tokenwith the API keycopied in the previous steps.
If you are using both SSO with OIDC and SCIM, please make sure that the users assigned in both apps are the same.
